The steps below describe how to do an independent Refund of goods and services by entering card data in Moneris Go portal payment fields.11 The independent Refund fully or partially reverses (refunds) an unreferenced credit card sale and restores funds to a cardholder's credit card.
Note: The independent Refund is disabled by default but can be enabled (temporarily or for a longer period) for your store upon request provided that the store is not set up to support Tap to Pay (Moneris Go app).
Log into the Moneris Go portal, and access the store through which you want to perform the transaction (see Logging into Moneris Go portal).22
Note: If you have multiple stores linked to your user account, you can use the My Stores function to move between your stores (see Using My Stores).
On the sidebar menu (shown below), click on Payment.
Note: If the sidebar menu is not displayed on your screen, click on the "menu" ![]() icon in the top left corner of your screen, or expand your browser window to display the sidebar menu.
icon in the top left corner of your screen, or expand your browser window to display the sidebar menu.

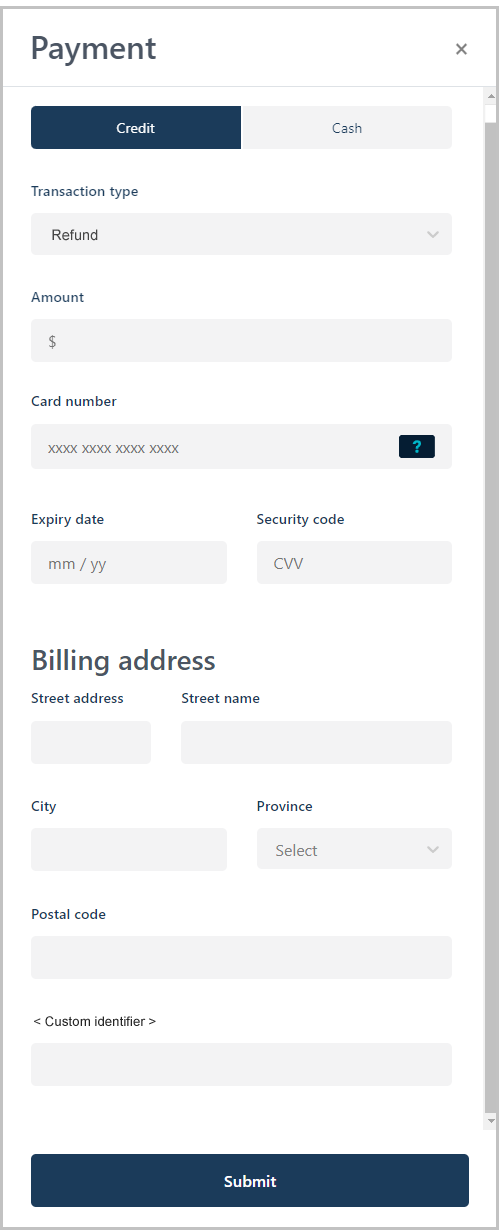
When the "Payment" window displays (shown below), do the following:

a. Click on the Credit button.
b. In the "Transaction type" drop-down, select Refund.
c. In the "Amount" field, enter the refund dollar amount ($0.00).
Enter the credit card data:
a. In the Credit Card Number field, enter the credit card's 16-digit PAN (personal account number).
b. In the Expiry date field, enter the credit card's expiry date (mm/yy).
c. In the Security code field, enter the credit card's 3- or 4-digit card verification value.
If the "Billing address" fields display (Street number, Street name, City, Province, and Postal code), enter the cardholder billing address data.
Note: To configure billing address fields, see Store settings: payments.
If the custom transaction identifier field displays, enter the requested data.
Note: To configure a custom transaction identifier, see Custom ID: store settings.
Click on the Submit button to send the transaction for processing.
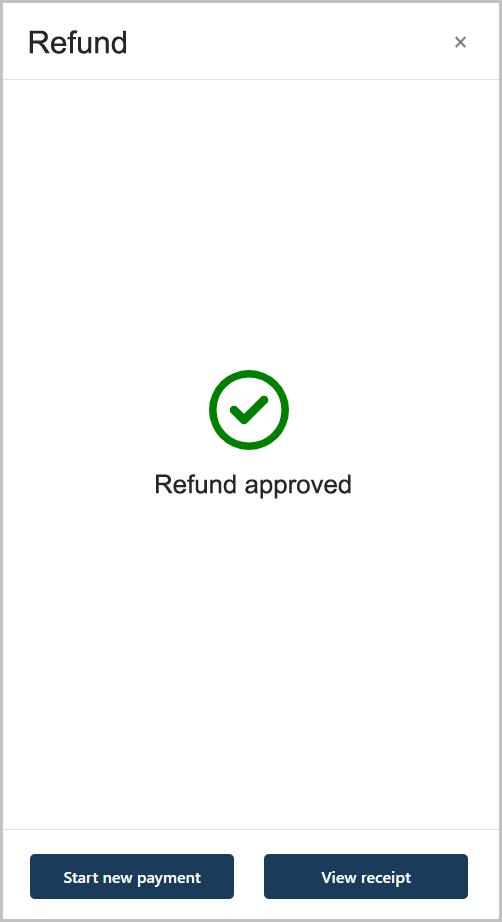
When the "Refund" window displays the "approved" or "declined" response (shown here), the transaction is complete. Do one of the following:
To view, print, or send (email/text) the transaction receipt:

a. Click on the View receipt button.
b. Continue in Sending/printing a transaction receipt.
To initiate a new Purchase, Preauthorization, or independent Refund:
a. Click on the Start New Payment button.