Add food items and non-alcoholic drinks to a menu
There are four types of items you can add to a menu:
- Individual food items, including non-alcoholic beverages: Follow the instructions in this topic to add individual food items to your menus.
- Alcoholic beverages
- Combos
- Pizzas
Important: Ensure you have created all categories and modifiers before adding a menu item.
- On the portal’s main menu, click Menu.
- On the Menu screen, click the category under which your food item will go. For example, if you are creating a main dish, select your Mains category. A list of all the items assigned to the menu category appear.
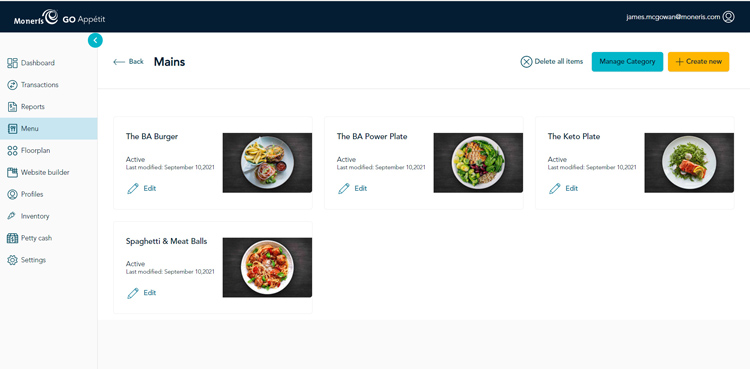
- Click the Create new button in the top right corner.
- From the list of options, click Individual food item. The Menu panel appears with the Basic tab selected.
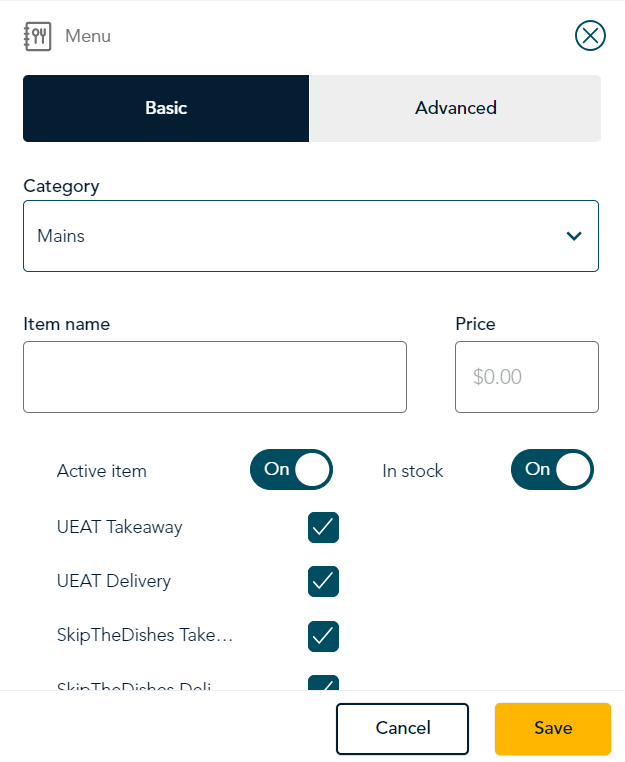
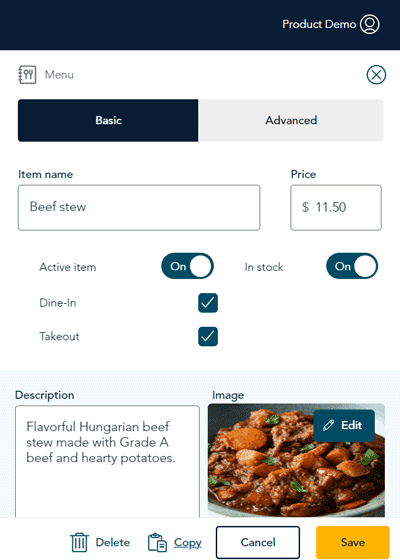
- Click inside the Item Name field and enter the item’s name that will appear on your menu.
- Click inside the Price field and enter the default or base price for this menu item.
Note: If the item has modifiers that alter its price, do not enter the ‘modified’ price; use this field for the ‘base’ price of the item. Modifiers will increase or decrease the price when they are added at the time of ordering.
- Ensure the Active item and In stock checkboxes are checked. Uncheck one or both boxes if this item is not available.
- Order types: Decide whether this menu item is available for each order type (Take-out and/or Delivery). Uncheck any order type that does not apply.
- Click inside the Description field and enter a description of the menu item.
- If you have a picture of the menu item, follow the instructions below to add the image to the item. If not, proceed to step 11.
- In the Image section, click the Edit button. The Edit image side panel appears.
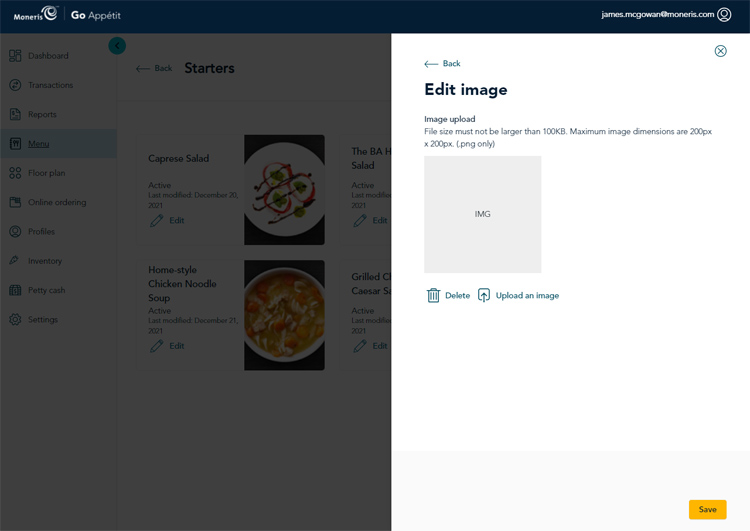
- Click Upload an image. The image must be a .png file. The maximum file size is 100 KB. The maximum dimensions are 200 x 200 pixels.
- Browse your computer’s hard drive for the image file you wish to add. Once located, select the image file and click the Open button to attach the image to the menu item. The image now appears on the screen.
- Click the Save button at the bottom of the Edit image side panel. The Menu panel reappears and the image is now present.
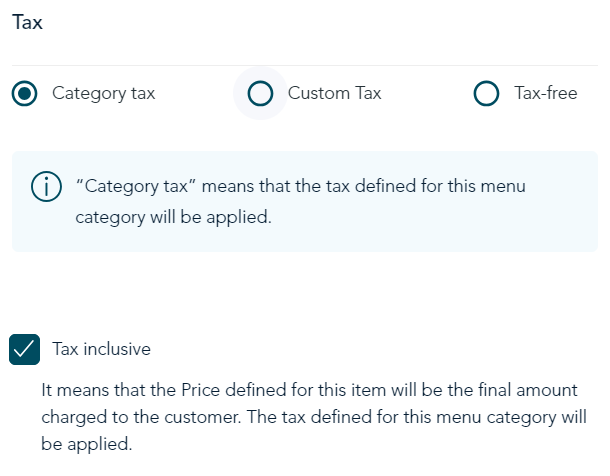
- Choose the tax settings for this item by clicking one of these options: Category tax, Custom tax, or Tax-free. Refer to Tax settings for an explanation of each option.
- If you selected Custom tax, click on the dropdown menu and pick a tax profile that is different from the tax profile associated with the menu category.
- If you want taxes to be included in the price of the item, click the checkbox next to Tax inclusive. The price you specified in step 6 will be the price paid by the customer.
- If the menu item has mandatory modifiers, follow the instructions below. If the menu item does not have mandatory modifiers, proceed to step 12.
Note: Mandatory modifiers mean that a customer ordering this item will be required to specify a modifier when ordering; they will not be able to specify “none”.
- Below the Description and Image sections, click Add new mandatory modifier. The Modifiers (mandatory) panel appears.
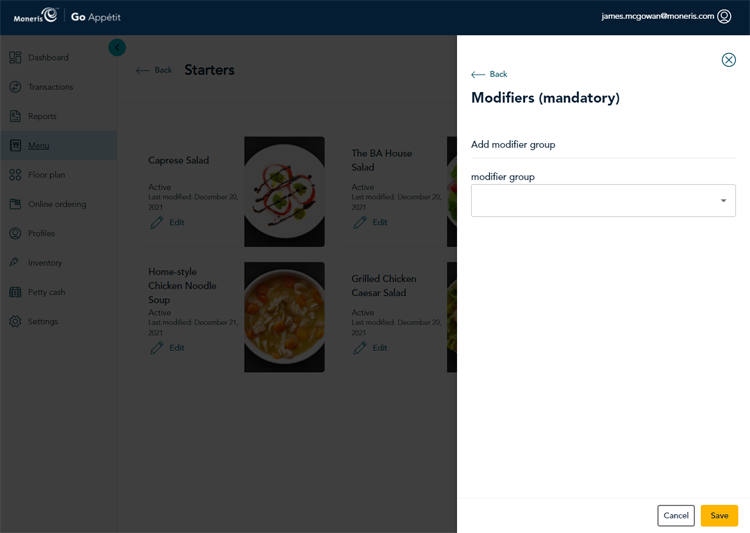
- Select the modifier group to which the modifier belongs from the Modifier Group drop-down field. For example, if you are creating a dessert, you would select the ‘Desserts’ modifier group. A "Configure" section appears below the field.
- Determine whether to enable multi-select or multi-quantity (or both). Multi-select allows the customer to choose more than one option. Multi-quantity is a variation of multi-select. Multi-quantity allows the customer to select more than one option but also allows them to double (triple, etc) the quantity of a single modifier. Let's use an example of salad toppings with a maximum of three selections. If you enable multi-select, the customer could choose goat cheese, cranberries, and walnuts. If you enable multi-quantity, the customer could choose goat cheese and 2 servings of walnuts, or they could choose 3 servings of walnuts.
- To enable multi-select proceed to step d.
- To enable multi-quantity proceed to step e.
- To enable both, follow steps d and e.
- If the mandatory modifier is mutually exclusive, meaning the customer is allowed to select only one item, leave the boxes unchecked and proceed to step f.
- Tap the checkbox next to Allow multi-select. In the Min and Max selections fields, enter the minimum and maximum numbers of options that customers can choose to modify their order.
- Tap the checkbox next to Allow multi-quantity. In the Min and Max selections fields, enter the minimum and maximum numbers of options that customers can choose to modify their order.
Note: Mandatory modifiers cannot have a minimum value less than 1.
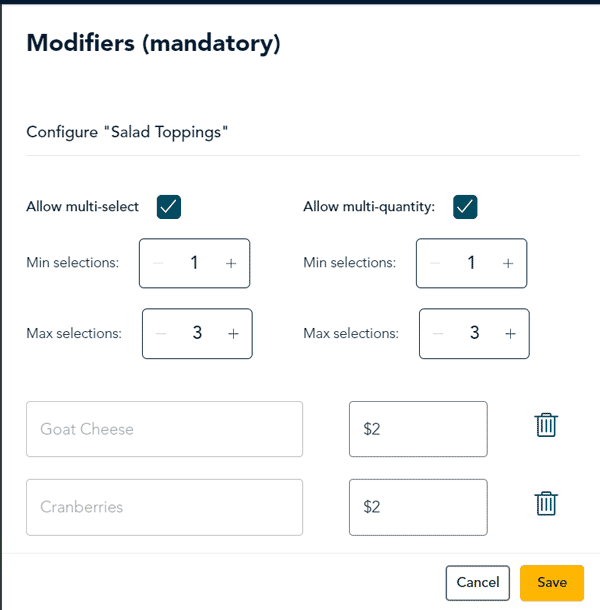
- In the fields below multi-select and multi-quantity, place prices next to the modifiers if there is an extra charge. Click the trashcan icon (
 ) next to the modifiers that do not belong to this menu item to remove them.
- Click the Save button at the bottom of the Modifiers (mandatory) side panel. The Menu panel reappears.
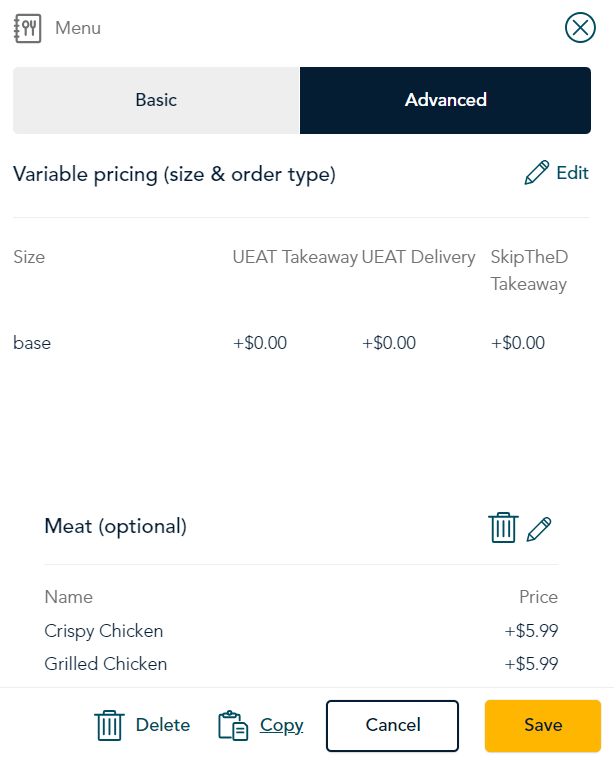
- Click the Advanced tab at the top of the Menu panel. The Variable pricing panel appears.
- If your menu item has different sizes, follow the instructions below. If your item is one size, skip this step and proceed to step 17.
- Click Edit beside Variable pricing.
- Click inside the Item size field and enter a size name.
- Click inside the Price field and enter the additional charge for this size.
- Click Add.
- Repeat steps 16a – 16c to add additional sizes and price points as needed.

- Configure order types. If your item has different prices for the different order types, for example, it costs more for a delivery order, follow the instructions below. If your item has the same price no matter the order type, skip this step and proceed to step 18.
- Click inside the Price field for each order type for each size created in step 16 and enter the extra amount you will charge for this size.
Note: It is important to only add the amount that you will charge on top of the base price into this field. If the smallest size costs $3.50, and this size costs $5.00, then you would enter “$1.50” into this field. If you entered $5, you would end up charging $8.50 for this item in the larger size instead of $5.
Note: Use the horizontal scroll bar to scroll to the right to see additional price fields for each of the defined order types.
- When finished, click Save in the bottom right corner of the Variable pricing side panel. The Menu side panel reappears.
- If you need to add optional modifiers, such as optional side dishes or toppings, proceed to step 20. If your menu item setup is complete, proceed to step 21.
Note: Unlike mandatory modifiers, customers have the choice of choosing "none" for optional modifiers.
- To add optional modifiers, follow these steps:
- Click Add new optional modifier.
- In the Modifiers (optional) panel, click the Modifier group drop-down menu and select the modifier group to which the modifiers belong. For example, if you are working with a dessert, select your ‘Desserts’ modifier group.
- Determine whether to enable multi-select or multi-quantity (or both). Multi-select allows the customer to choose more than one option. Multi-quantity is a variation of multi-select. Multi-quantity allows the customer to select more than one option but also allows them to double (triple, etc) the quantity of a single modifier. Let's use an example of salad toppings with a maximum of three selections. If you enable multi-select, the customer could choose goat cheese, cranberries, and walnuts. If you enable multi-quantity, the customer could choose goat cheese and 2 servings of walnuts, or they could choose 3 servings of walnuts.
- To enable multi-select proceed to step d.
- To enable multi-quantity proceed to step e.
- To enable both, follow steps d and e.
- If the optional modifier is mutually exclusive, meaning the customer is allowed to select a maximum of one item, leave the boxes unchecked and proceed to step f.
- Tap the checkbox next to Allow multi-select. In the Max selections field, enter the maximum numbers of options that customers can choose to modify their order.
- Tap the checkbox next to Allow multi-quantity. In the Max selections field, enter maximum numbers of options that customers can choose to modify their order.
Note: For optional modifiers, the minimum value is always 0.
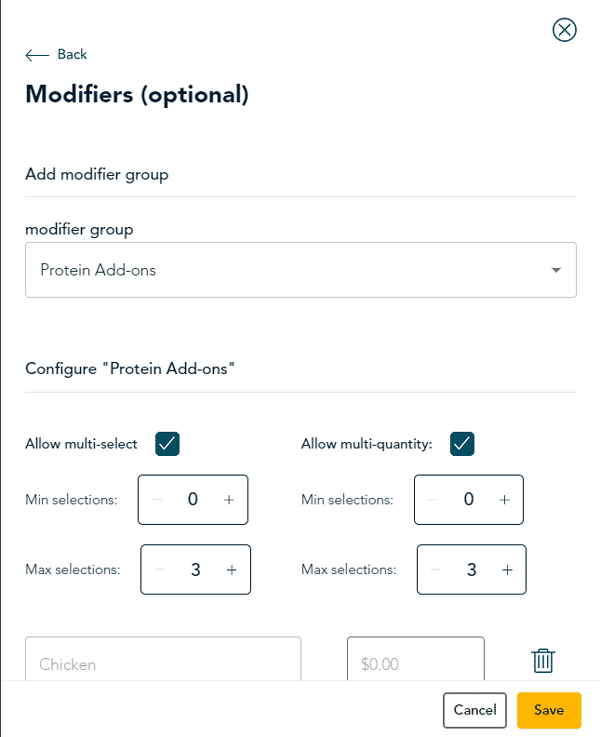
- In the fields below, place prices next to the modifiers that are available for this menu item if there is an extra charge. Click the trashcan icon () next to the modifiers that do not apply to this menu item to remove them.
- Click the Save button in the bottom of the Modifiers panel. The Menu panel reappears.
- Click Save at the bottom of the Menu panel. The menu category screen reappears showing the menu item you just added.
- Repeat these steps to add more menu items as needed.