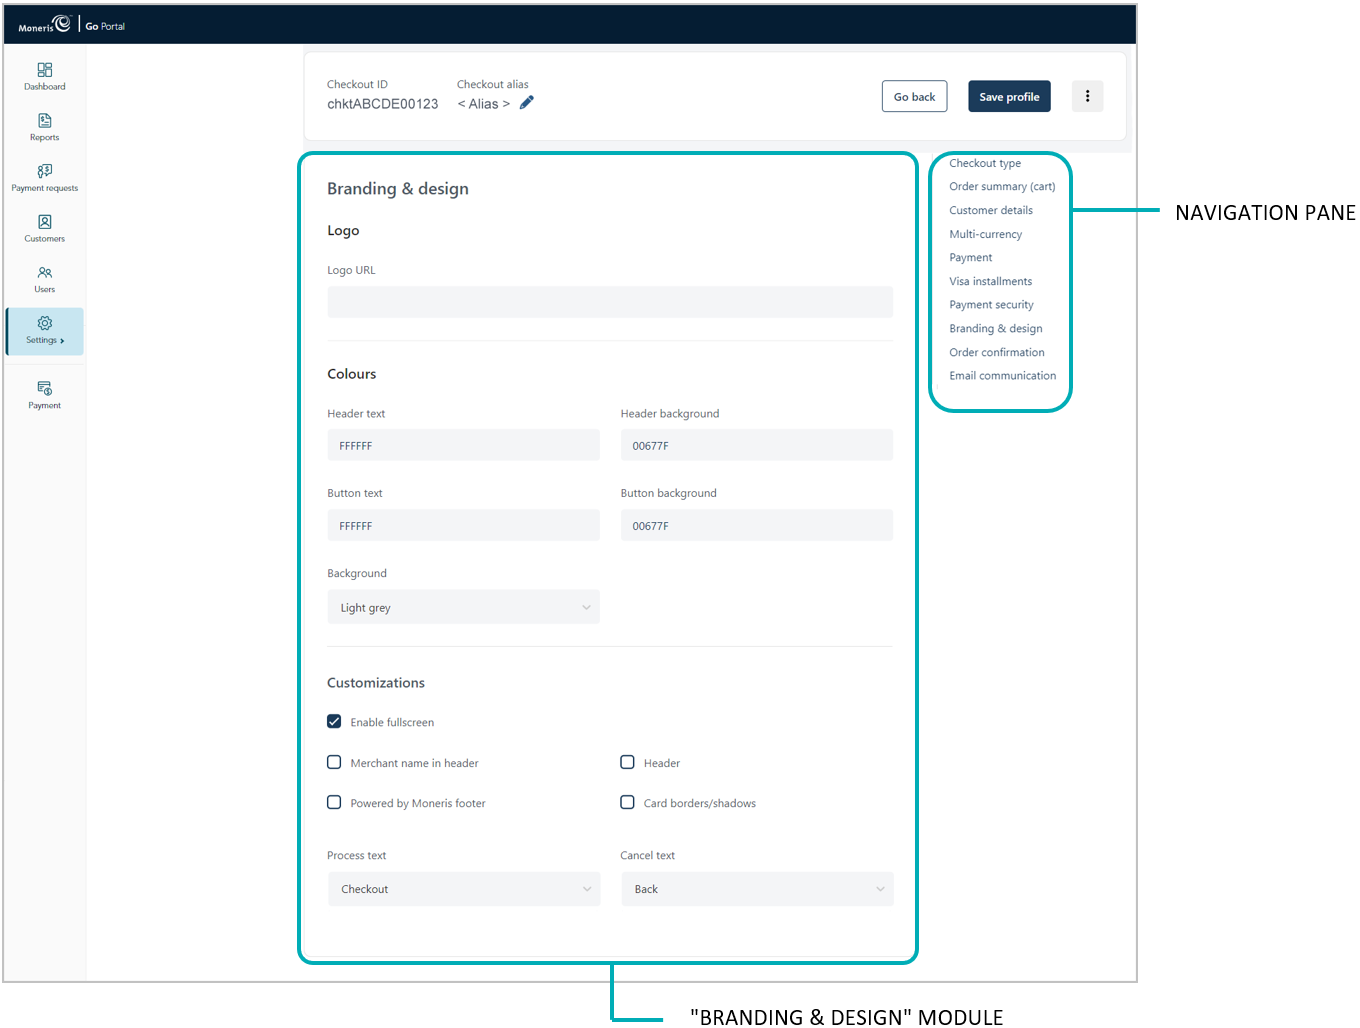
Follow the steps below to configure the checkout's branding and design elements, including logo, colours, and customizations like payment window type, merchant name, headers, footers, and navigation button names.
Important! To integrate Moneris Checkout into your ecommerce solution, you need to create and configure your Moneris Checkout profile in conjunction with developing your ecommerce solution according to Moneris' integration specifications as outlined in How to get started.
Ensure the checkout profile that you want to configure is open on your screen.
Note: To reopen an existing profile, see Reopening a Moneris Checkout profile. To create a new profile, see Creating a Moneris Checkout profile.
While the profile is open in your configurator, click on Branding & design in the navigation pane to jump to the "Branding & design" module (shown below).

Configure the checkout's branding & design elements as desired:
Logo
a. Go to the "Logo" area in the module, and enable/disable a logo:
To enable a logo, enter the logo image file address in the URL field.
To disable a logo, leave the URL field unfilled.
Colours
a. Go to the "Colours" area in the module, and do one or more of the following:
In the Header text and Header background fields, enter HEX values to format the respective colour aspects of the checkout header.
In the Button text and Button background fields, enter HEX values to format the respective colour aspects of the button on which your customer will click on to submit their order for processing.
In the "Background" drop-down list, click on a supported background colour (Light grey or White) to select (enable) it.
Customizations
a. Go to the "Customizations" area in the module, and set controls for the size of the checkout's payment form window:
To enable Moneris to control the size of the payment form window, checkmark the Enable fullscreen box.
Note: If this option is enabled, you may customize the checkout's payment form further by configuring additional options as instructed in step b of this procedure.
To control the size of the payment form window yourself, unmark the Enable fullscreen box.
b. Enable/disable the payment form customization options Header, Merchant name in header, Powered by Moneris footer, and Card borders/shadows per your requirements.11
To enable a customization, checkmark the box beside the desired customization.
To disable a customization, unmark the box beside the undesired customization.
c. From the "Process text" drop-down list, select a label to display on the button on which the checkout customers will click to submit their order (e.g., Checkout, Buy, Purchase, Book, Subscribe, Donate, or Process).
d. From the "Cancel text" drop-down list, select the text of the hyperlink on which the checkout customers will click to interrupt the submission of their order so that they can return to your ecommerce site (e.g., Cancel, Back, Back to Store, or Continue Shopping).
Save the profile's new configuration:
a. Click on the Save profile button.
b. When the "Successfully updated the profile" response displays, the operation is complete:
To preview a full-screen version of the checkout, see Previewing the checkout.
To configure other profile settings, see List of Moneris Checkout features/settings.
To exit the MCO configurator, click on the Go back button (unsaved changes will be discarded).