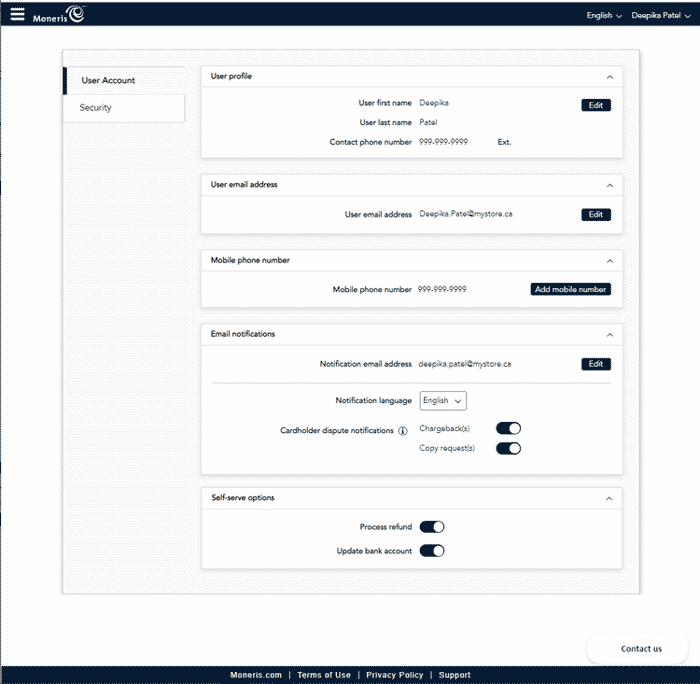
It is possible to update your user account information in Merchant Direct, including:

There are two methods to access the User Account screen:
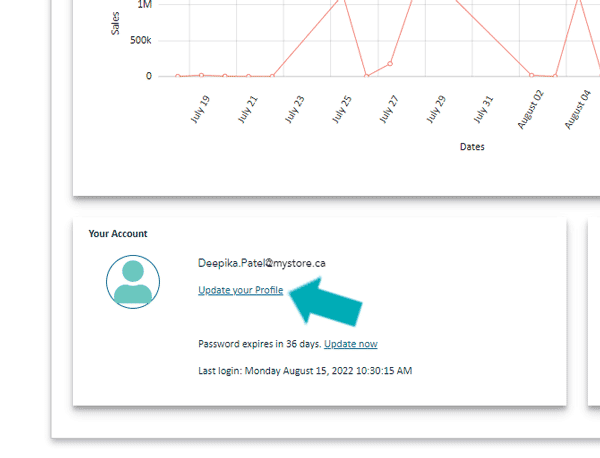
From the dashboard, in the Your Account section, click the Update your Profile link (pictured below).
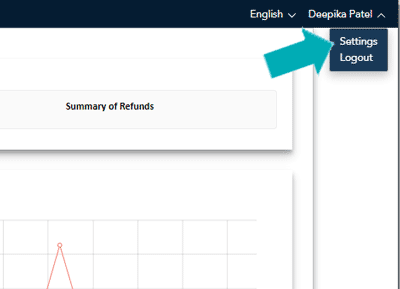
From the dashboard, click your user name in the top right corner of the screen, and on the menu that appears, click Settings (pictured below).
Follow the instructions below to update your user profile information.
Note: Fields marked with an asterisk (*) are mandatory.
In the User Account screen, in the User Profile section, click the Edit button. The User Profile popup appears.
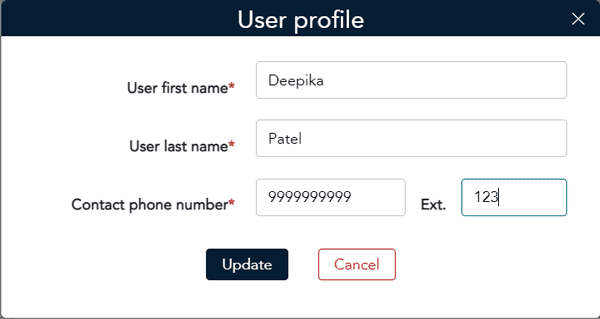
Update your information as required:
Click inside the User first name field and enter your first name.
Click inside the User last name field and enter your last name.
Click inside the Contact phone number and enter your business contact number.
Optional: Click inside the Ext. field and enter an extension for your business phone number.
Click the Update button at the bottom of the popup. The User Account screen reappears.
This email address is used for password resets and communications with you. Follow the instructions below to update the email address associated with your profile for Merchant Direct.
In the User Account screen, under the User email address section, click the Edit button. The User email address popup appears.
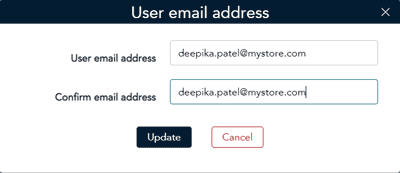
Click inside the User email address field and enter the new email address you'd like to associate with your profile.
Click inside the Confirm email address field and re-enter the new email address.
Click the Update button at the bottom of the popup. The Verify Email Address popup appears.

Follow the instructions below to update or add a mobile phone number to your profile.
In the User Account screen, under the Mobile phone number section, click the Edit button (or the Add new number button if you have not yet added a number to your account). The Mobile phone number popup appears.
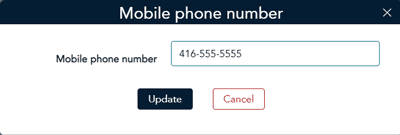
In the Mobile phone number field, enter the new mobile phone number you would like to associate with your profile.
Click the Update button at the bottom of the popup. The Verify Mobile Phone Number popup appears.
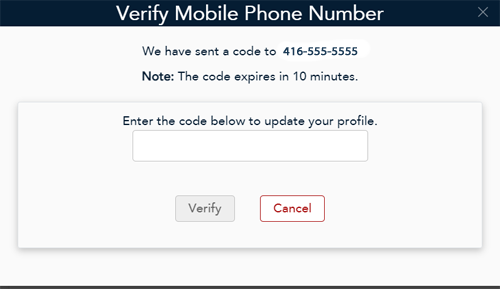
Wait for the verification code to be sent to your mobile phone. Once it arrives via SMS text, enter the number into the field in the Verify Mobile Phone Number popup, then click the Verify button. The popup closes and the User Account screen reappears.
This email notifications are about setting email notifications for both chargebacks and copy requests. Follow the instructions below to update your email for notifications, set the language for the notifications and turn on or off the chargebacks and copy requests in your profile.
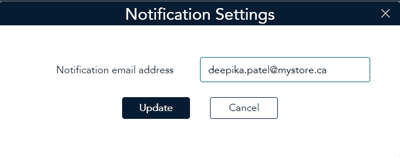

You can set the preferred language to receive notifications as well as turn on or off the chargebacks and copy requests at any time.
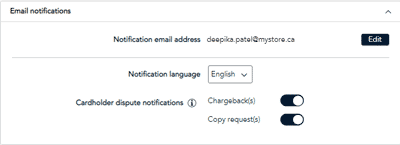
Note: Toggle button will be grey when it is selected off.
Administrator users can update the settings for a basic user to enable or disable them to process refunds

Note: Toggle button will be grey when it is selected off.
Note: The notification email address can either be the same as the user account email address (login email) or it can be set to a different email address.
Note: Fields marked with an asterisk (*) are mandatory.
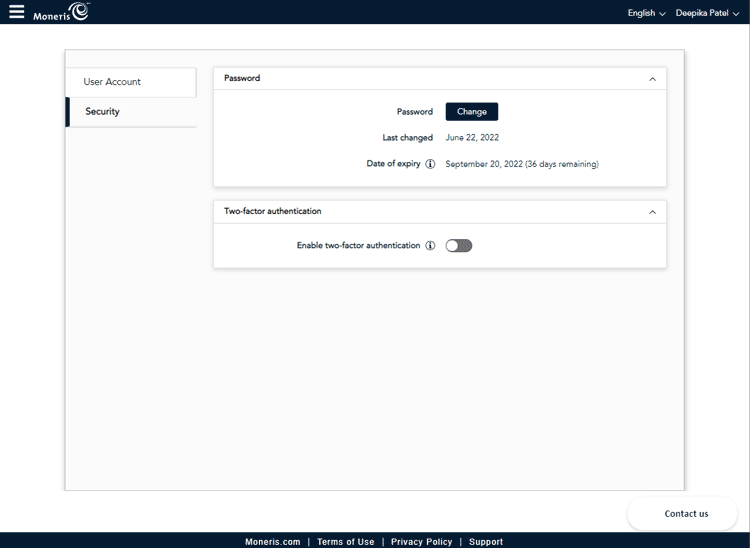
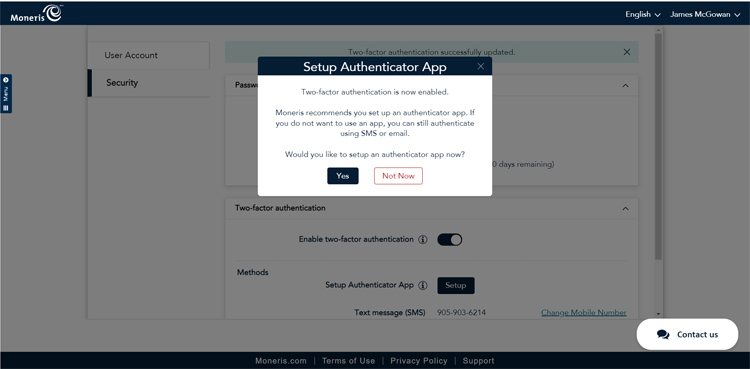
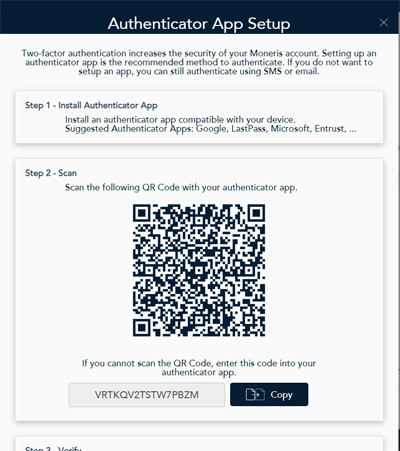
Two-factor authentication is an additional layer of security on your personal logon. Follow the instructions below to enable two-factor authentication on your logon and set up the optional authenticator app.
Note: The authenticator app is optional and provides an additional layer of security, but is not mandatory for two-factor authentication to be enabled.
Note: The authenticator app will need to be installed on a separate mobile device.
When exporting reports to CSV, or using the CSV downloader section for the SFTP reports, you can choose to have the header row included or excluded from the CSV file that is generated. The header row contains the report column headings, which help for readability when looking at a CSV file. However, some systems into which the CSV file is later imported do not require headers and only work with the data.
Note: CSV files automatically add padding spaces around the values when they are downloaded without headers, so keep this in mind when choosing this setting.
Note: Enabling or disabling this feature is applicable to all CSV files that Merchant Direct creates for the reports.