Purchase
Follow these steps to process a purchase transaction in the Moneris Go app when the customer pays with a debit or credit card or by digital wallet.
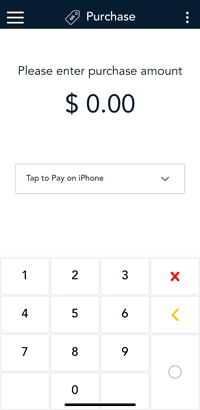
Purchase screen navigation
Press [ ◯ ] to accept the value entered.
Press [ X ] to remove any entered amount.
Press [ ☰ ] to display the navigation draw.
Press [ < ] to remove the right-most digit from the amount field.
If all digits are removed, $0.00 is displayed.
Process a Transaction
- Sign in to your Moneris Go app.

- Start at the Purchase screen. This is the default screen.
If your Moneris Go app is on a different screen, tap the Main menu  icon on the top left side of the screen, then tap Transactions.
- Use the on-screen numeric keypad to enter the purchase amount, then tap OK ◯.
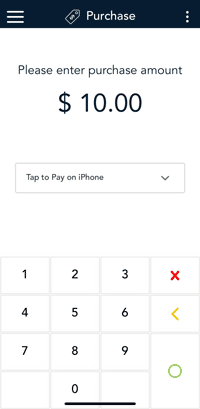
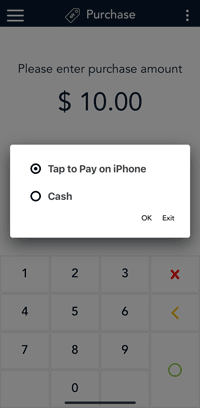
- Tap the Tap to Pay on iPhone dropdown to display the payment options.
- The popup appears, tap on Tap to Pay on iPhone, then tap OK.
Note: This is the default option.
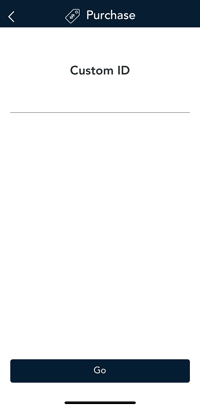
- If the Custom ID screen appears, you may enter your ID or leave it blank.
Note: This is optional, you do not need to enter an ID.
Note: The maximum number of characters in this field is 20 in length.
- Tap Go to continue.
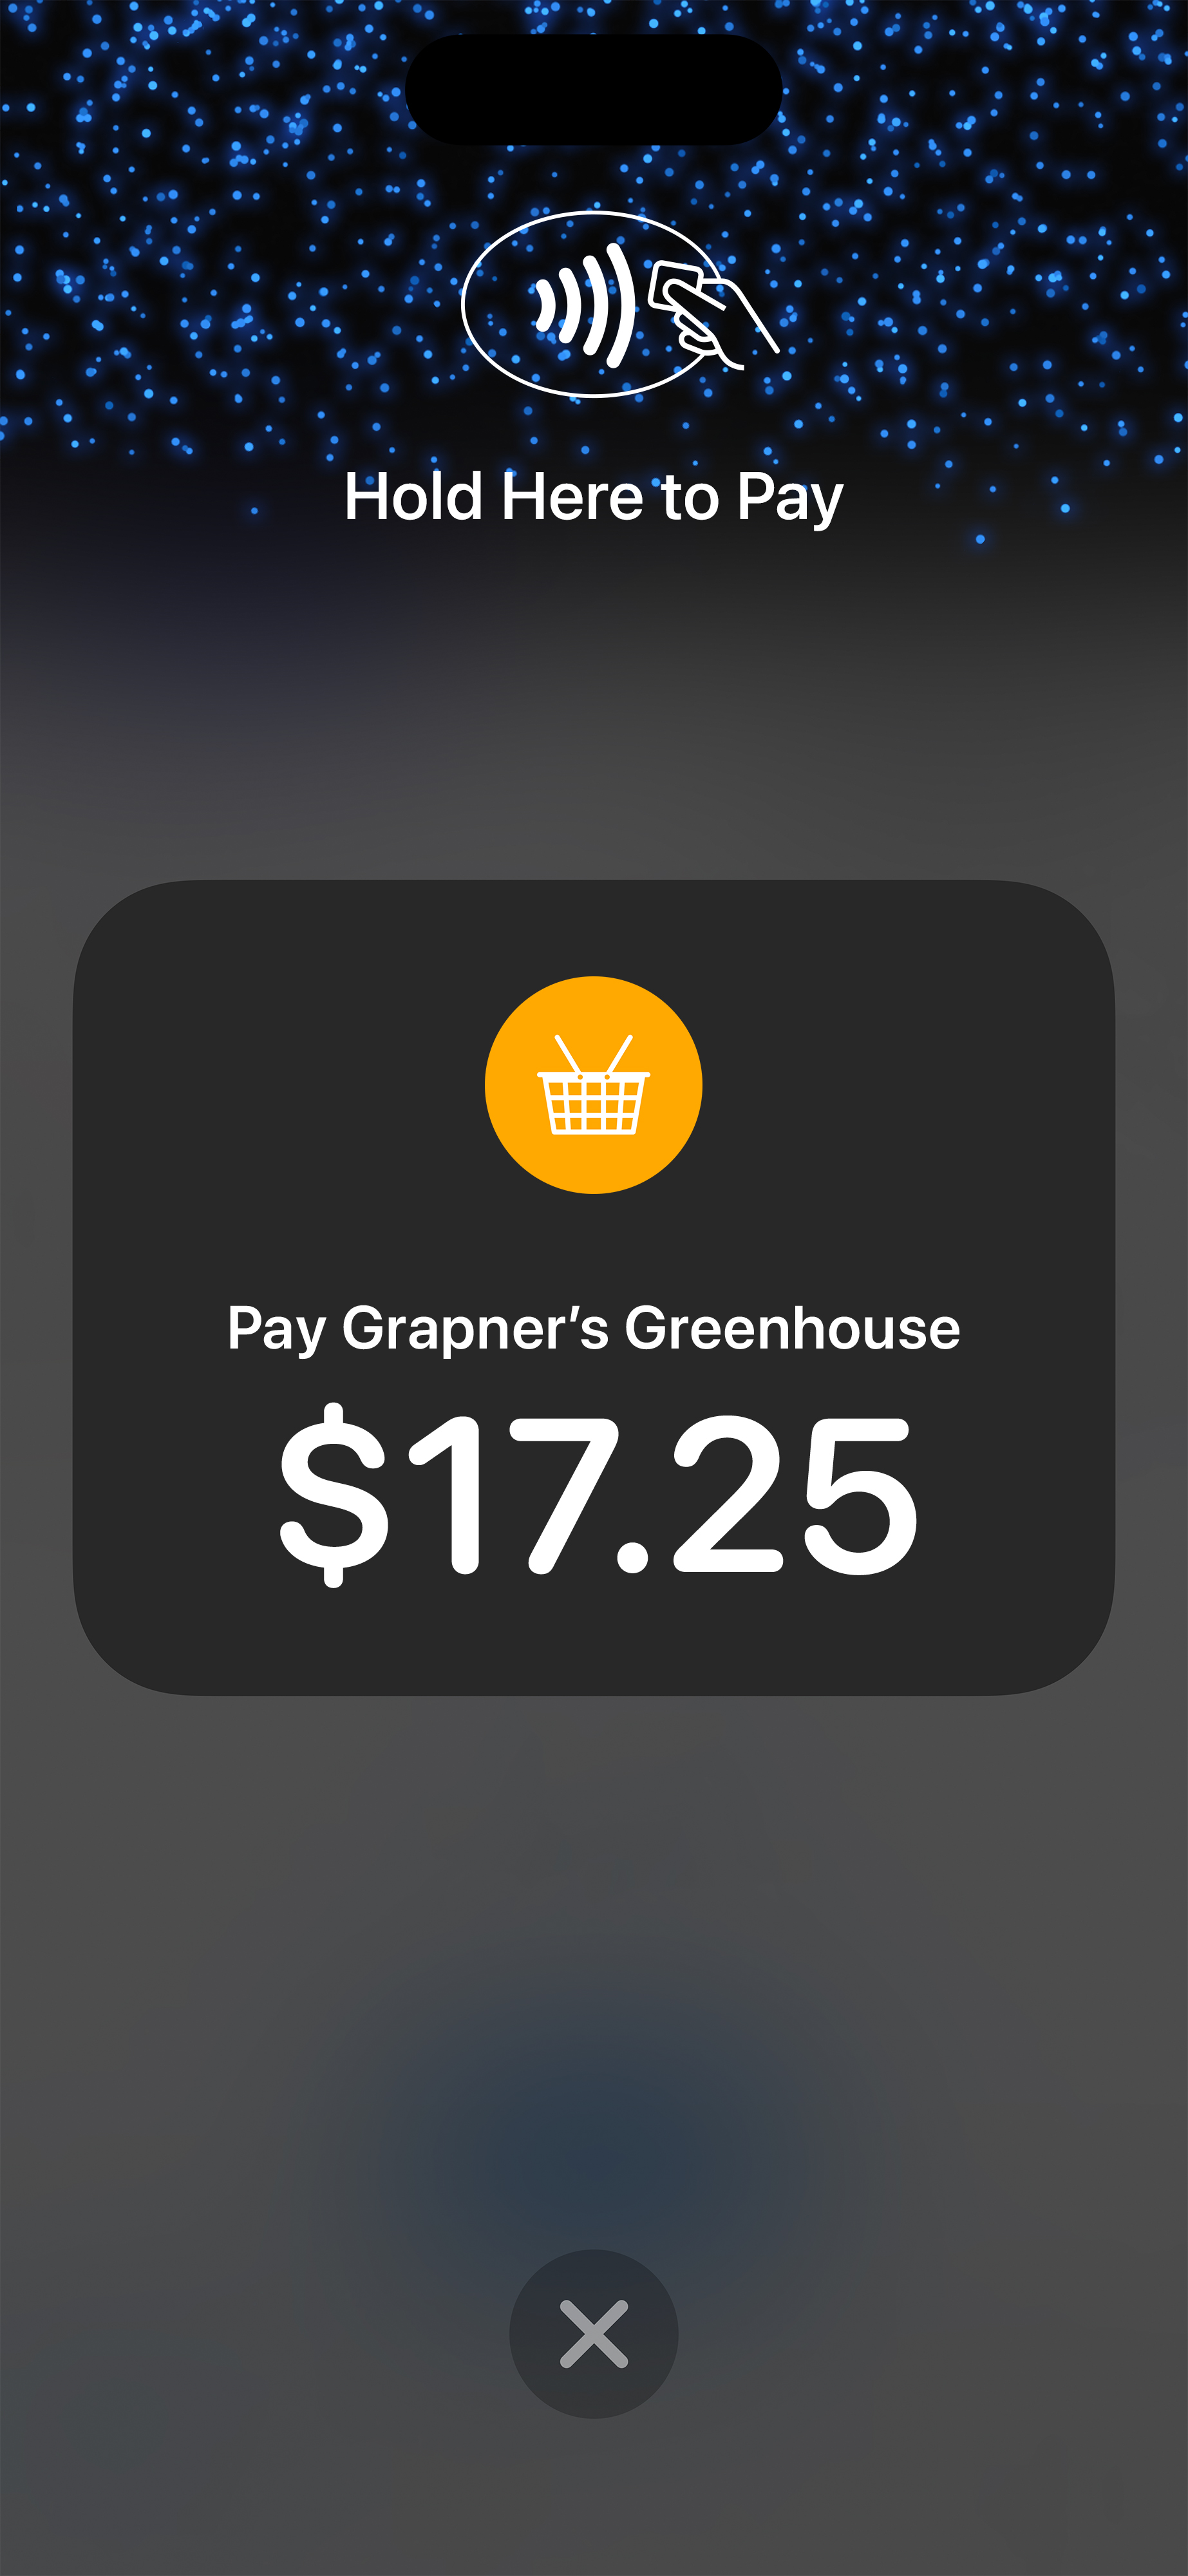
- The screen will automatically change and prompt you to "Hold Here to Pay".
- Present your iPhone towards the customer.
Note: If you have Tip enabled, the customer will proceed through the tip options.
Note: The screen will rotate, or you can tap the purchase amount on the screen to rotate the view towards the customer.
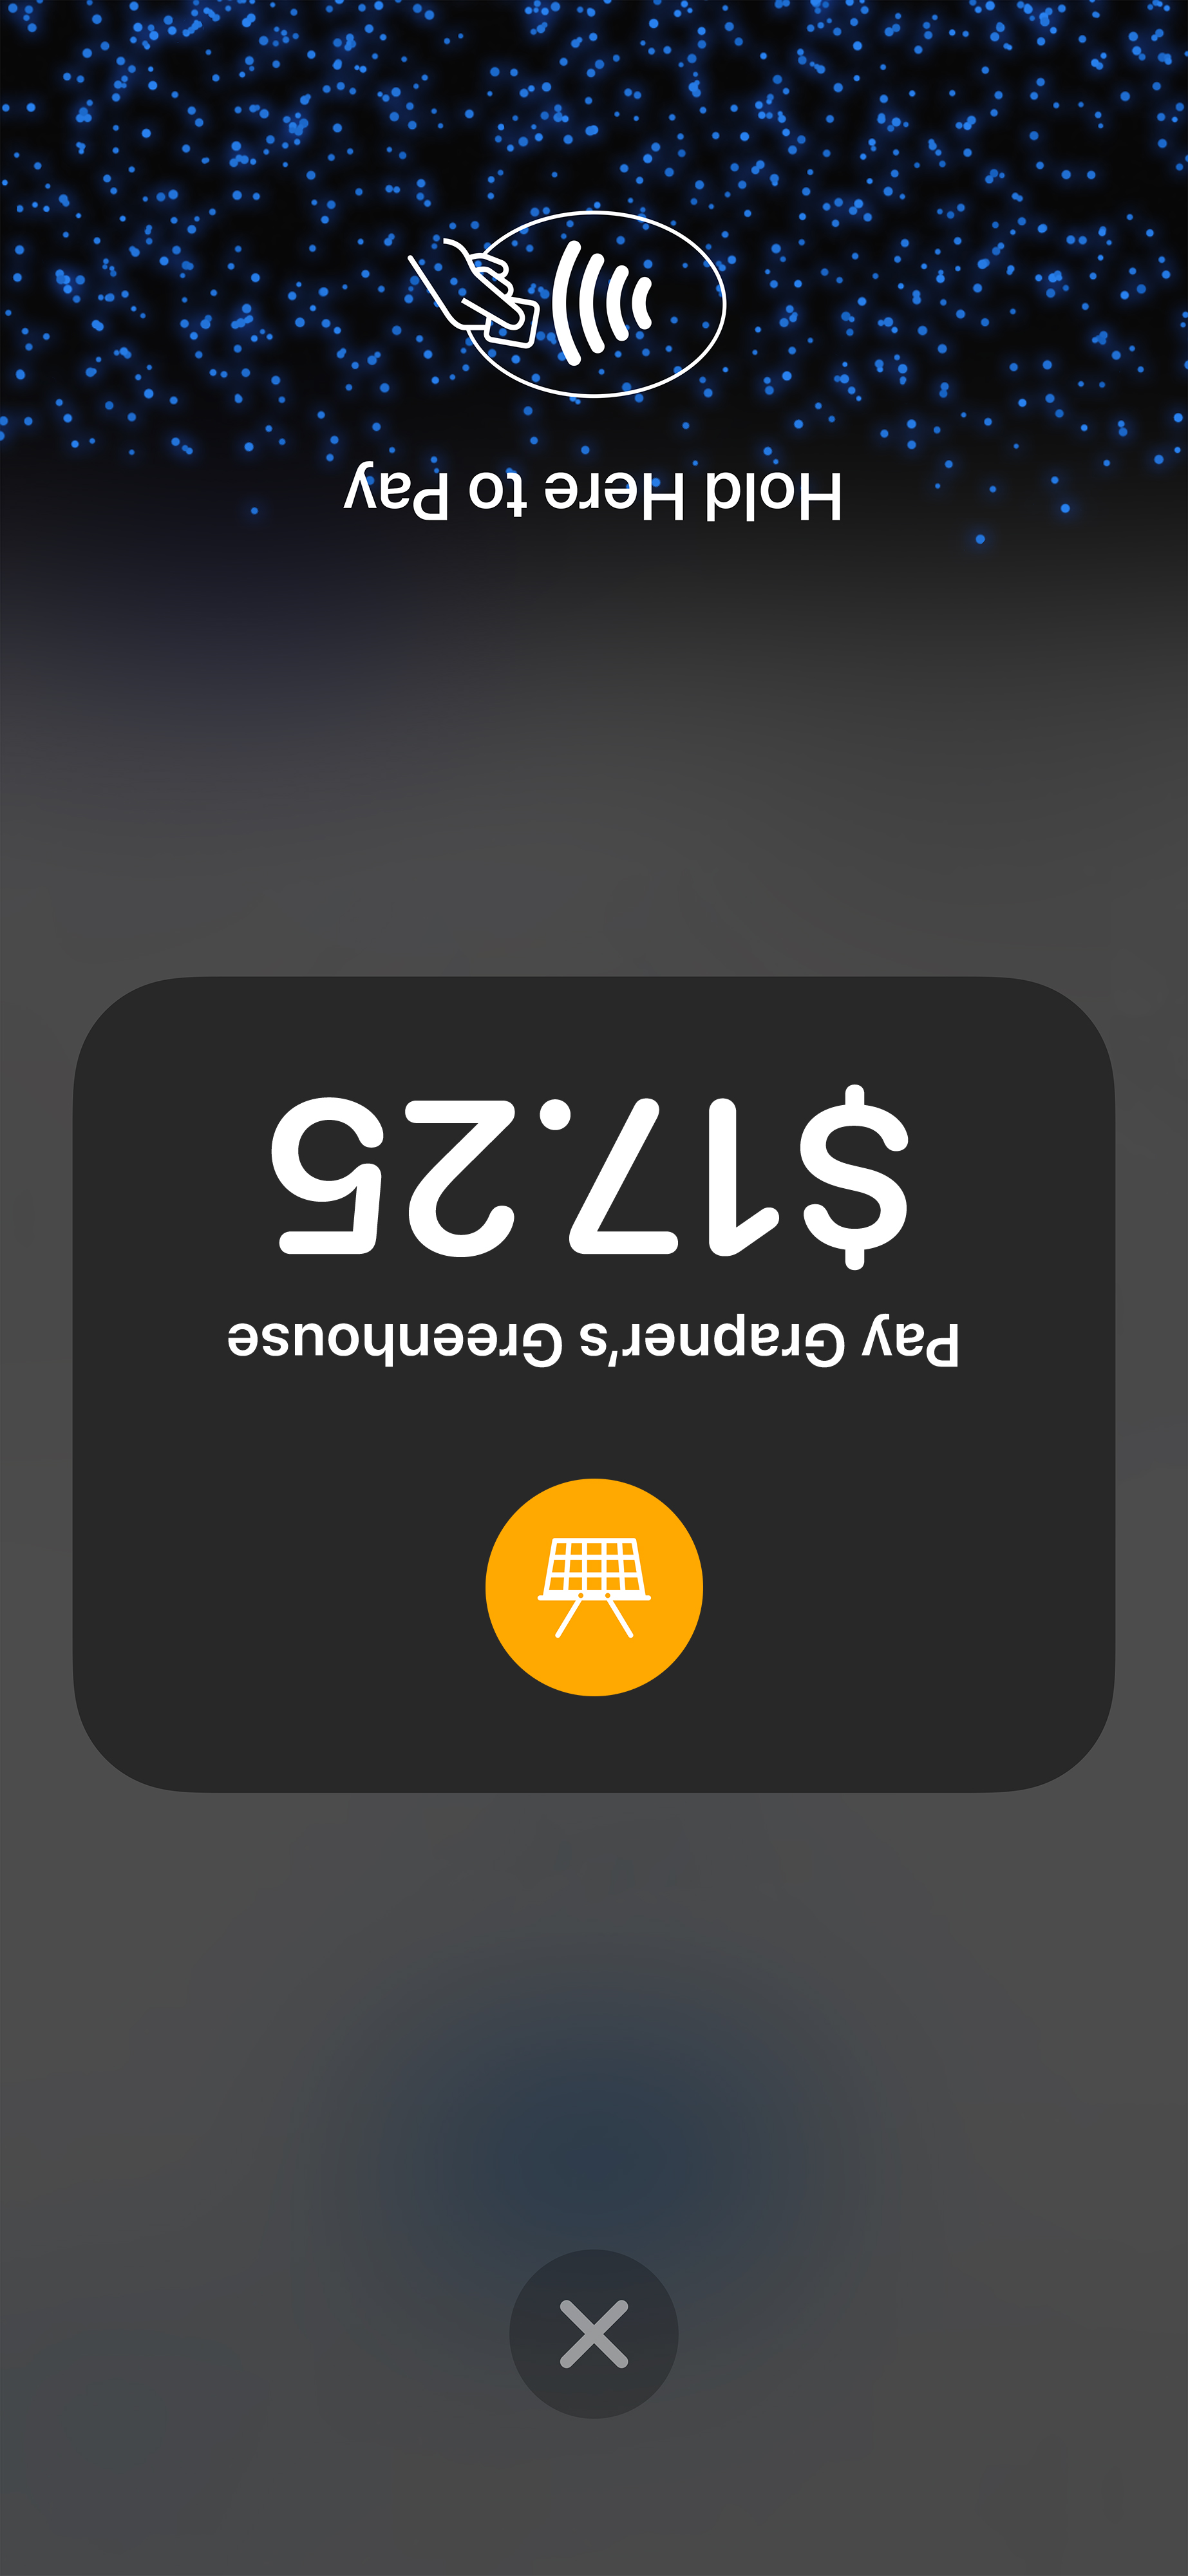
- When paying by card, your customer holds their card horizontally at the top of your iPhone, over the contactless symbol.
When paying with a digital wallet, your customer holds their device at the top of your iPhone, near the contactless symbol.
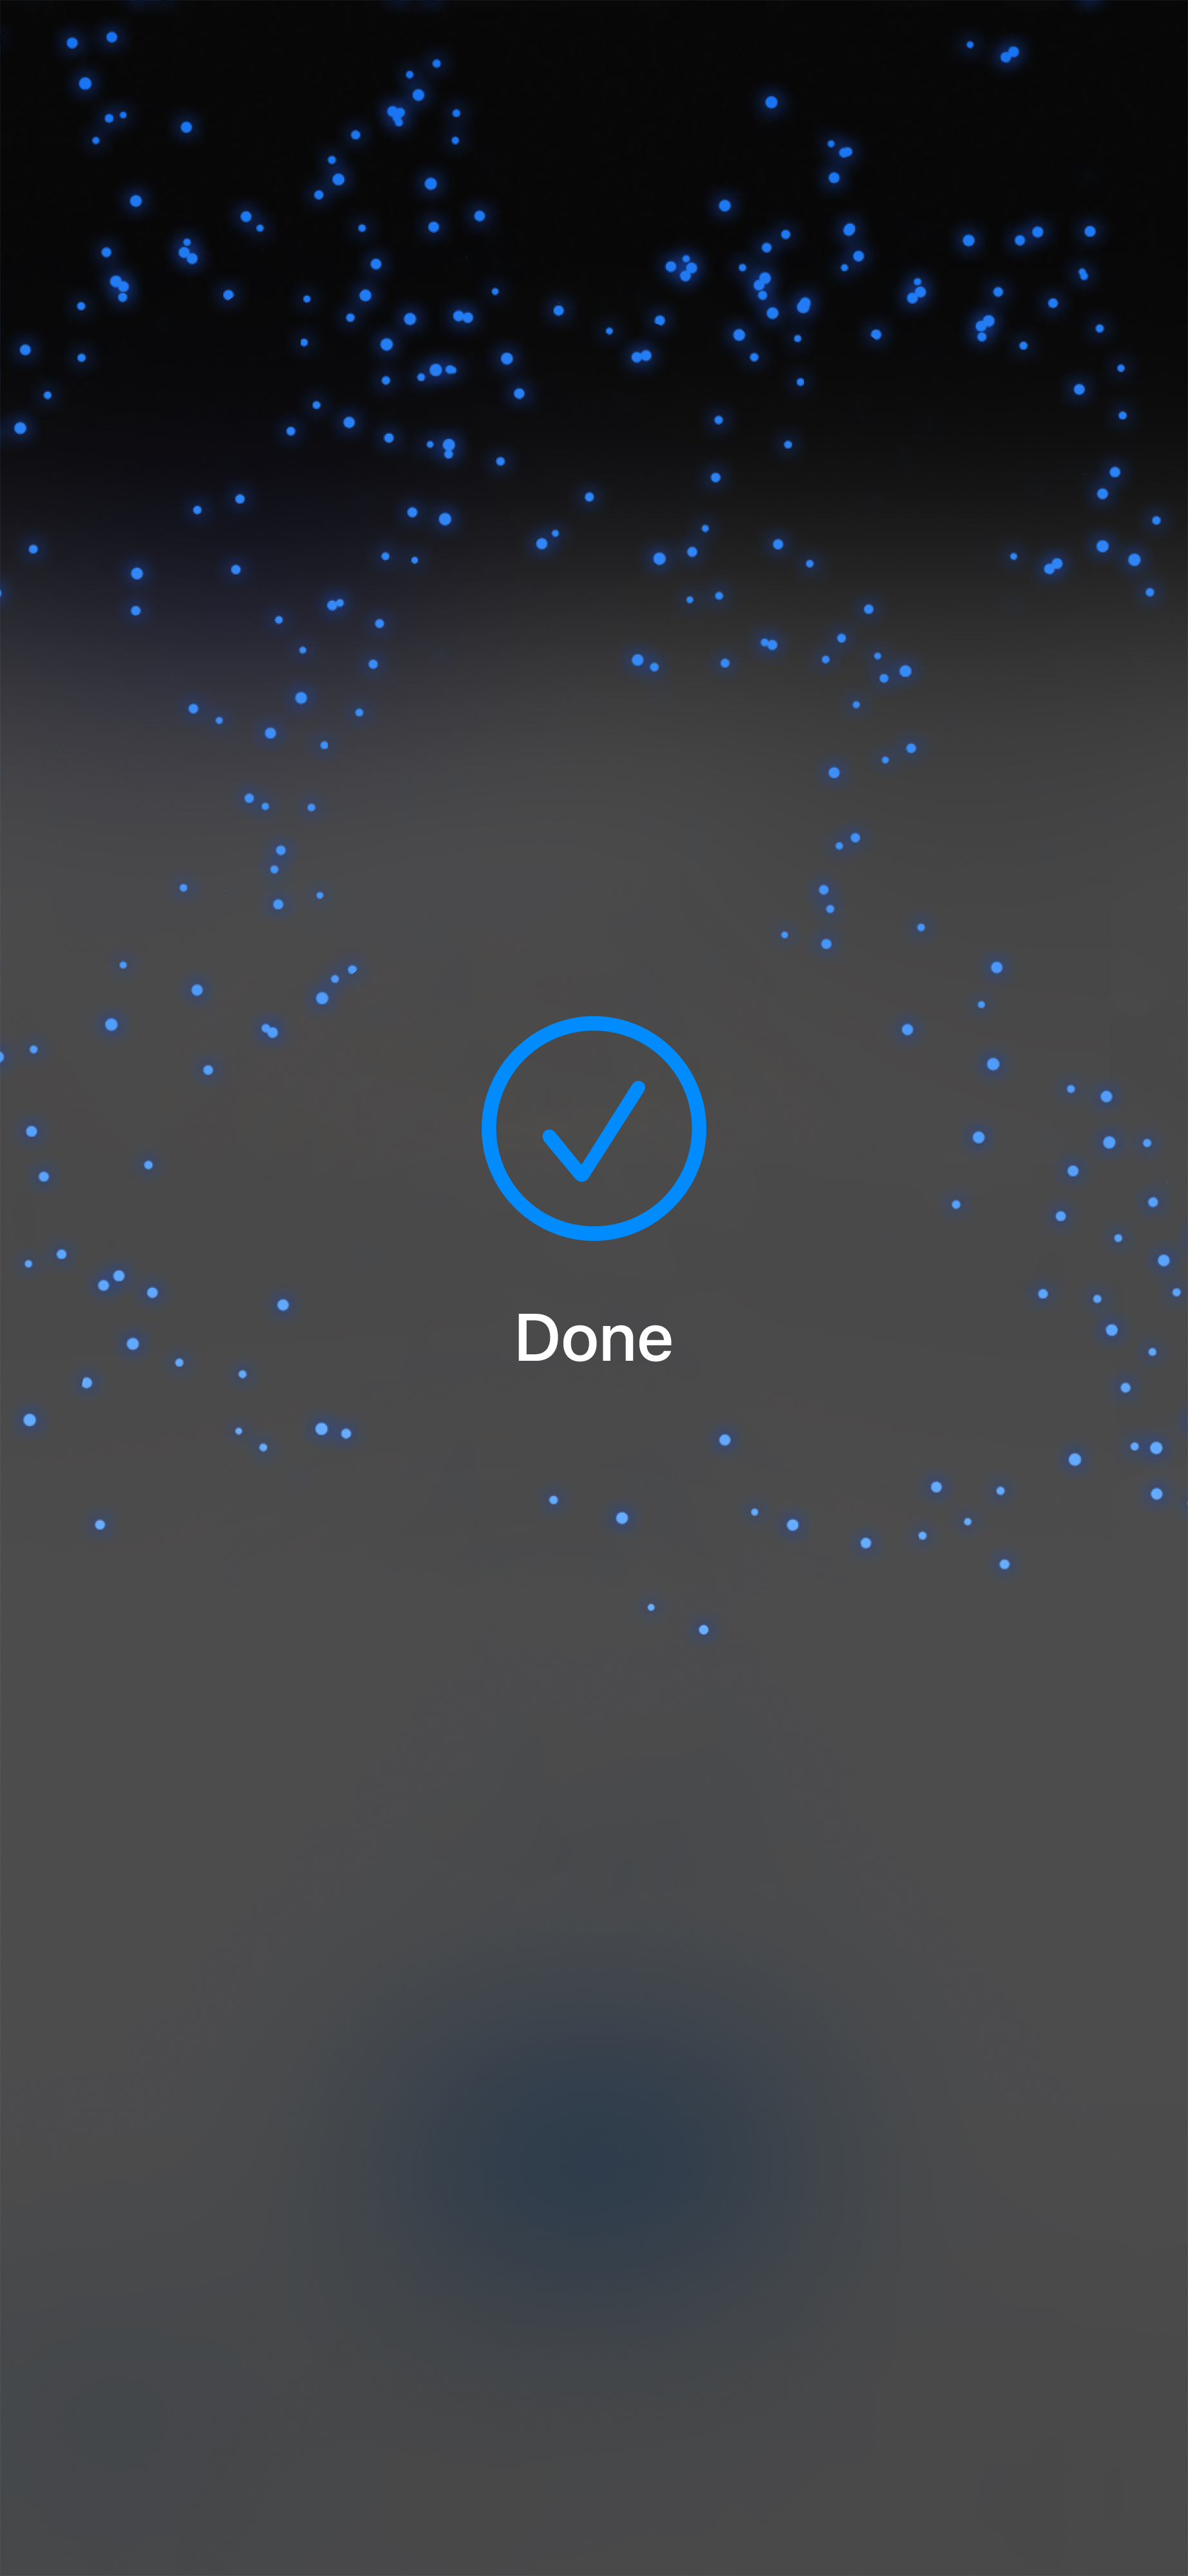
When you see the “Done” checkmark, the card read is complete and the transaction is being processed.
Note: The approved screen may display differently depending on the iOS version your iPhone is on.
- Once the purchase is approved, the “How would you like your receipt?” prompt appears, showing the customer the available options for receiving a receipt: Text, Email and No Receipt.
Note: You can choose which receipt options customers will see. Refer to Receipt settings.

- The customer selects a receipt format (or no receipt) by tapping one of the options on the screen. If the customer chooses Text or Email, they are prompted to enter the appropriate information, Otherwise continue to step 13.
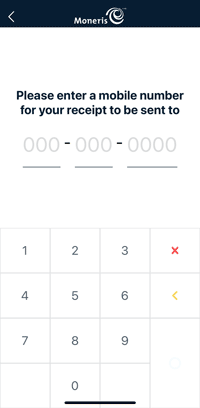
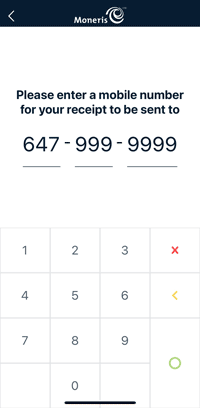
Text
- When Text is selected, the "Please enter a mobile number for your receipt to be sent to" prompt appears.
- The customer will enter the mobile number for the text receipt, then tap OK ◯.
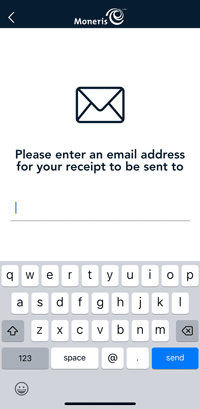
Email
- When Email is selected, the "Please enter an email address for your receipt to be sent to" prompt appears.
- The customer will enter the email address for the email receipt, then tap send.

- When the “Transaction Complete” prompt appears, tap OK to return to the default transaction screen.
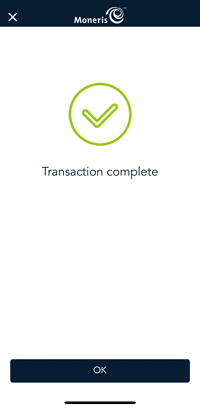
The Moneris Go app is ready to process the next transaction.