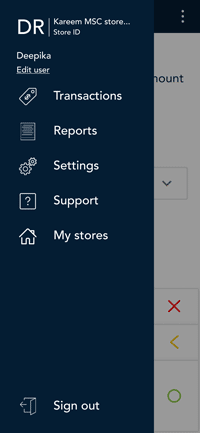
Receipts


Processing receipts from a transaction

Customer copy

The customer has up to 3 options for receiving a receipt: Email, Text and No Receipt, depending on how you have set up the receipt options

Customer option Merchant action
Email Customer enters their email address.

Moneris does not store the customer's email address. This means the customer will have to enter their email address each time they wish to receive a receipt by email.

Text Customer enters their 10-digit mobile phone number.

Moneris does not store the customer's cell phone number. This means the customer will have to enter their cell phone number each time they wish to receive a receipt by text.

No Receipt No action required. 


Resend receipts

To resend the customer copy, follow these steps.

Main menu
  1. Tap the Main menu  icon, tap Reports
Reports screen
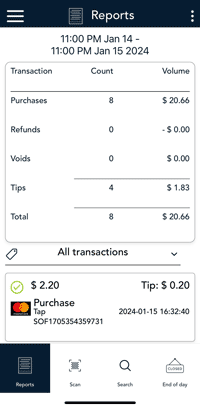
  1. On the Reports screen, tap the transaction you want to resend the receipt.

You can also tap Scan to scan the QR code from a receipt, or tap Search to look for the transaction. For instructions, refer to finding a transaction.

Transaction details screen
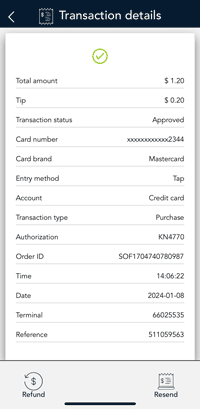
  1. When the transaction details appear, tap Resend.


Tap the Back  <   icon in the title bar to return to the previous screen.

Tap the Main menu  icon  and then tap Transactions to return to the default screen.

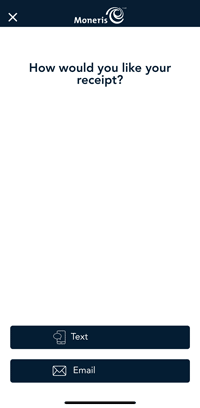
  1. The “How would you like your receipt?” prompt appears, showing the customer the available options for receiving a receipt: Text or Email

Note:      You can choose which receipt options customers will see. Refer to Receipt settings.


  1. The customer selects a receipt format by tapping one of the options on the screen. If the customer chooses Text or Email, they are prompted to enter the appropriate information.


For details for text or email, refer to finding a transaction.

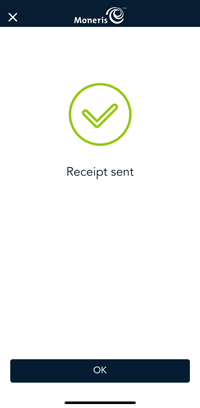
6.    The receipt is sent to the chosen option.

Tap OK.

You return to the transaction details screen where you processed the resend receipt.

Transaction details screen
  1. Tap the Back  <   icon in the title bar to return to the previous screen.

Tap the Main menu  icon  and then tap Transactions to return to the default screen.


Purchase receipt example

Note:     Receipts generated from iPhone transactions will be different.


Purchase receipt example
Item Description
A Transaction type. For example, Purchase, Refund, Void.
B Card type and card number.  Examples of card type include Interac, Visa, Mastercard, and American Express.  The card number is masked — an asterisk is printed in place of the card number except for the last four numbers.
C Chequing or Saving. Indicates which account was selected by the cardholder for an Interac card
D Card entry.  Indicates how the card information was entered, for example, tap, insert, or swipe.
E

Custom ID. You can customize the name of this field. The value for this field is the value that you enter on the terminal during the transaction.

F Order ID. You can use the Order ID to search for a transaction to void, to refund, or to resend the receipt.
G Email/Username. Indicates which user was signed in to the iPhone when the transaction was processed.
H Total.  This is the total sale amount including any tip.
I

QR code. You can scan the QR code on a receipt to immediately find the  transaction  on the terminal to void, to refund, or to reprint the receipt.

Note:     Receipts generated from iPhone do not have a QR code.


Note:     The QR code will not appear on receipts generated by transactions performed on the iPhone.

Card masking

When printed on receipts, all card numbers are masked except for the last 4 digits. Masking replaces a card’s numbers with asterisks (e.g., ************1234). The expiry date is not printed on any copy of any receipt.  These measures help to prevent fraud.