The steps below describe how to generate an alpha-numeric data key (Moneris Vault token) that is associated with a customer profile you will create by capturing payment card details, billing address details, and personal customer details, including a customer ID and contact information.
Note: When you save the profile, your Moneris Go portal store simultaneously processes a zero-dollar Verification transaction, which sends captured payment details, including billing address details (if submitted) to the card issuer and an address verification service (AVS). You can subsequently view the results of the Verification transaction and decide whether to retain or delete the profile.
Log into the Moneris Go portal, and access the store through which you want to create the Vault customer profile (see Logging into the Moneris Go portal).
Note: If multiple stores are linked to your user account, you can use the My Stores function to move between your stores (see Using My Stores).
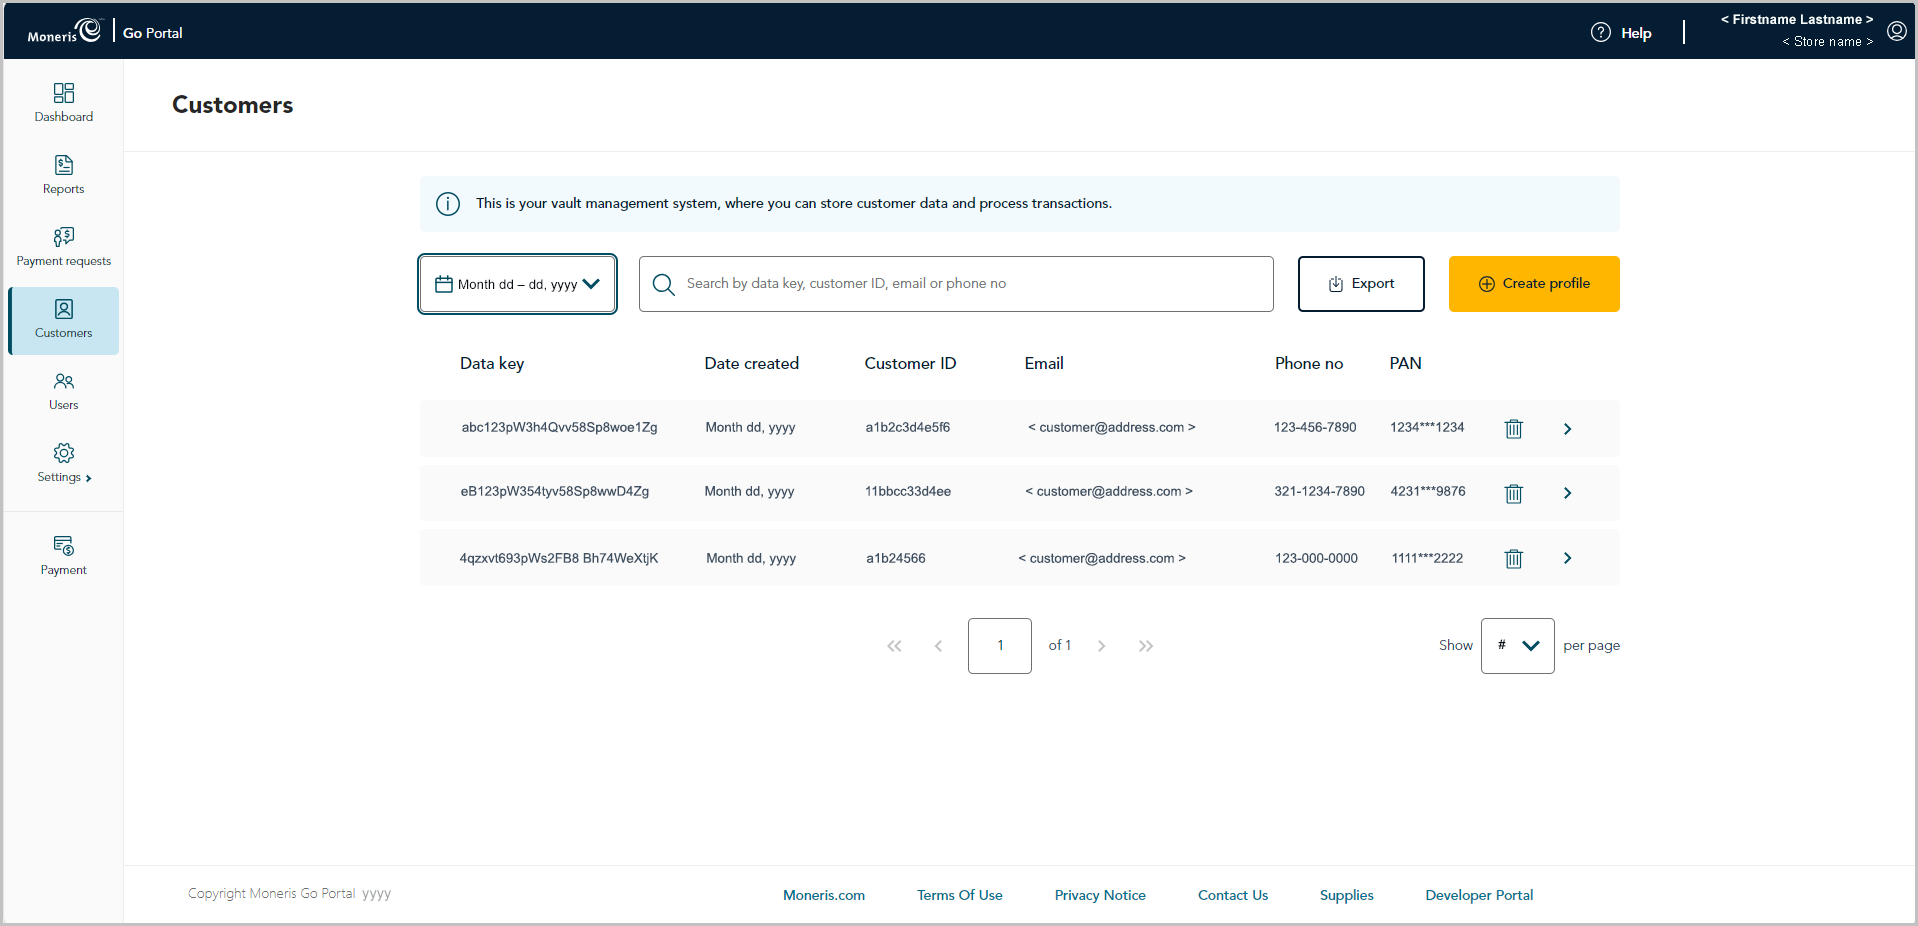
On the sidebar menu (shown below), click on Customers.
Note: If the sidebar menu is not displayed on your screen, click on the "menu" ![]() icon in the top left corner of your screen, or expand your browser window to display the sidebar menu.
icon in the top left corner of your screen, or expand your browser window to display the sidebar menu.

When the "Customers" page displays (shown below), click on the Create profile button.
Note: Any profile that was created within the date range specified in the calendar will be listed in the report.

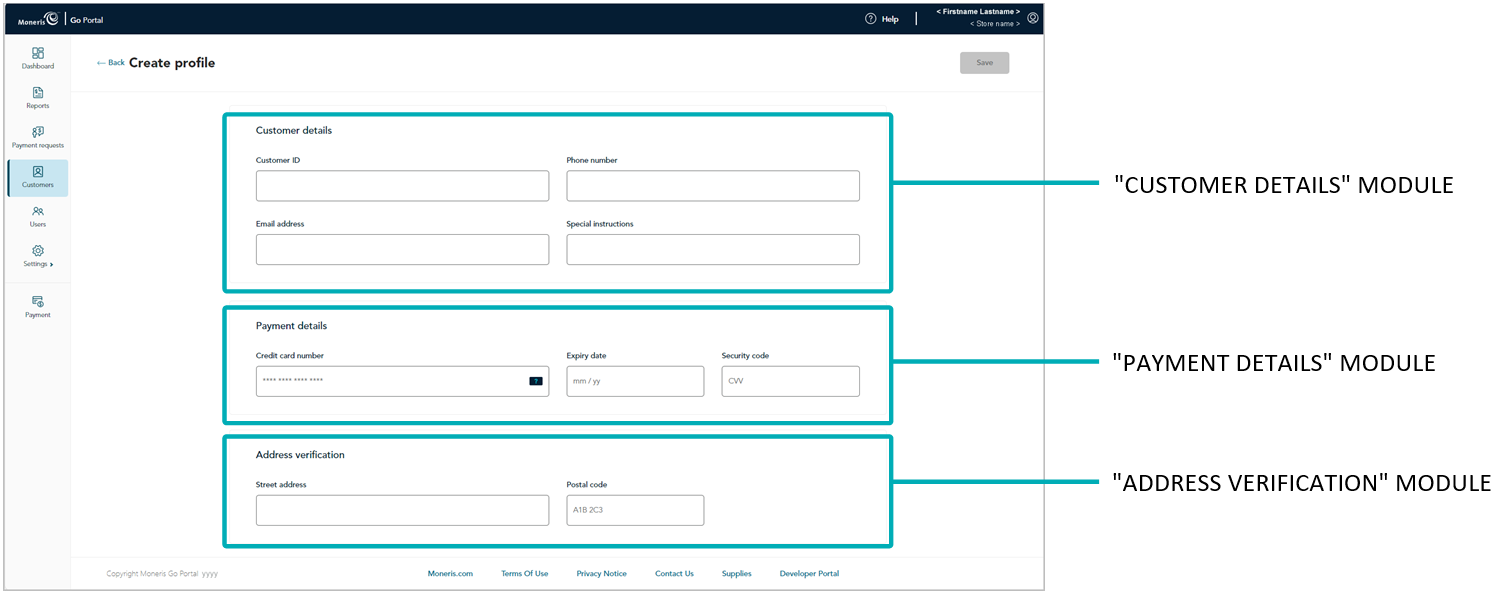
When the "Create profile" page displays (shown below), go to the next step.

Go to the "Customer details" module (shown above), and optionally fill in the fields:
Note: If you fill in the "Customer ID", "Phone number", and "Email address" fields, it will make it easier to subsequently retrieve the profile in a report should you ever need to update/delete the profile.
a. In the Customer ID field, optionally enter a customer identifier.
Note: Any data that you enter in this field will populate the "Custom ID" field of the Verification transaction that results when you save this profile.
b. In the Phone number field, optionally enter the customer's phone number.
c. In the Email address field, optionally enter the customer's email address.
d. In the Special instructions field, optionally enter additional information about the profile.
Go to the "Payment details" module (shown above), and fill in all the fields:
a. In the Credit card number field, enter the customer's/cardholder's credit card number. (Some card brands support debit card manual entry in this field.)
b. In the Expiry date field, enter the credit card's expiry date (mm/yy).
c. In the Security code field, enter the credit card's 3- or 4-digit card verification number (this number will not be stored in the profile).
Go to the "Address verification" module (shown above), and optionally enter the customer's/cardholder's billing address:
a. In the Street address field, enter the cardholder billing street address.
b. In the Postal code field, enter the cardholder billing postal code.
When you are finished capturing the profile details, click on the Save button.
Note: This action triggers Moneris Go portal to initiate a Verification transaction, which is sent to the Moneris host for processing as a zero-dollar transaction. If the Verification transaction is approved, the Vault customer profile will be successfully created (see Verification transaction: Vault customer profile).
When the "Profile successfully created" response displays, the operation is complete.
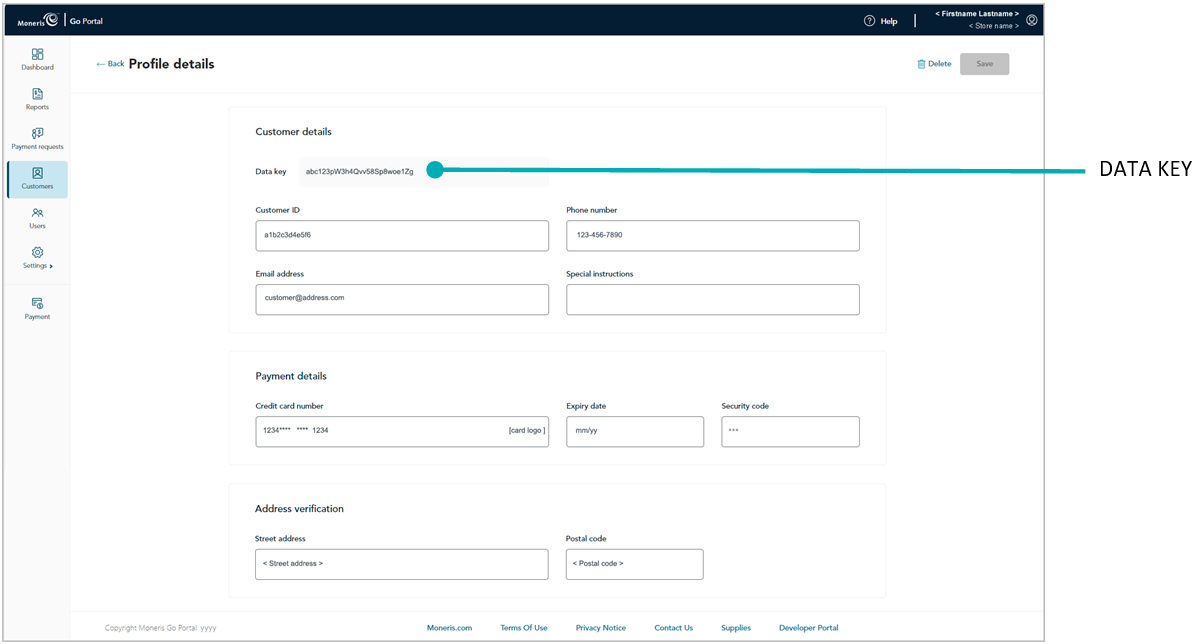
When the page refreshes into the "Profile details" page (shown below), the profile's unique data key will be listed in the "Customer details" module.
