The steps below describe how to access the settings for enabling/disabling Installments enabled by Visa ("Visa installments") on all terminals that are synched to your Moneris Go portal store. If you enable one or more installment plans (to a maximum of three), your synched terminals will display the option for cardholders to pay for a qualifying Purchase or Preauthorization over a defined time period in fixed, equal installment payments.
Note: For more information on the Visa installments solution, see Installments enabled by Visa.
Log into the Moneris Go portal, and access the store that is synched to the terminal(s) that you want to modify (see Logging into the Moneris Go portal).
Note: If multiple stores are linked to your user account, you can use the My Stores function to move between your stores (see Using My Stores).
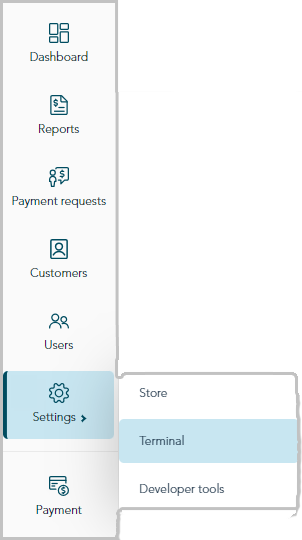
On the sidebar menu (shown below), click on Settings > Terminal.
Note: If the sidebar menu is not displayed on your screen, click on the "menu" ![]() icon in the top left corner of your screen, or expand your browser window to display the sidebar menu.
icon in the top left corner of your screen, or expand your browser window to display the sidebar menu.

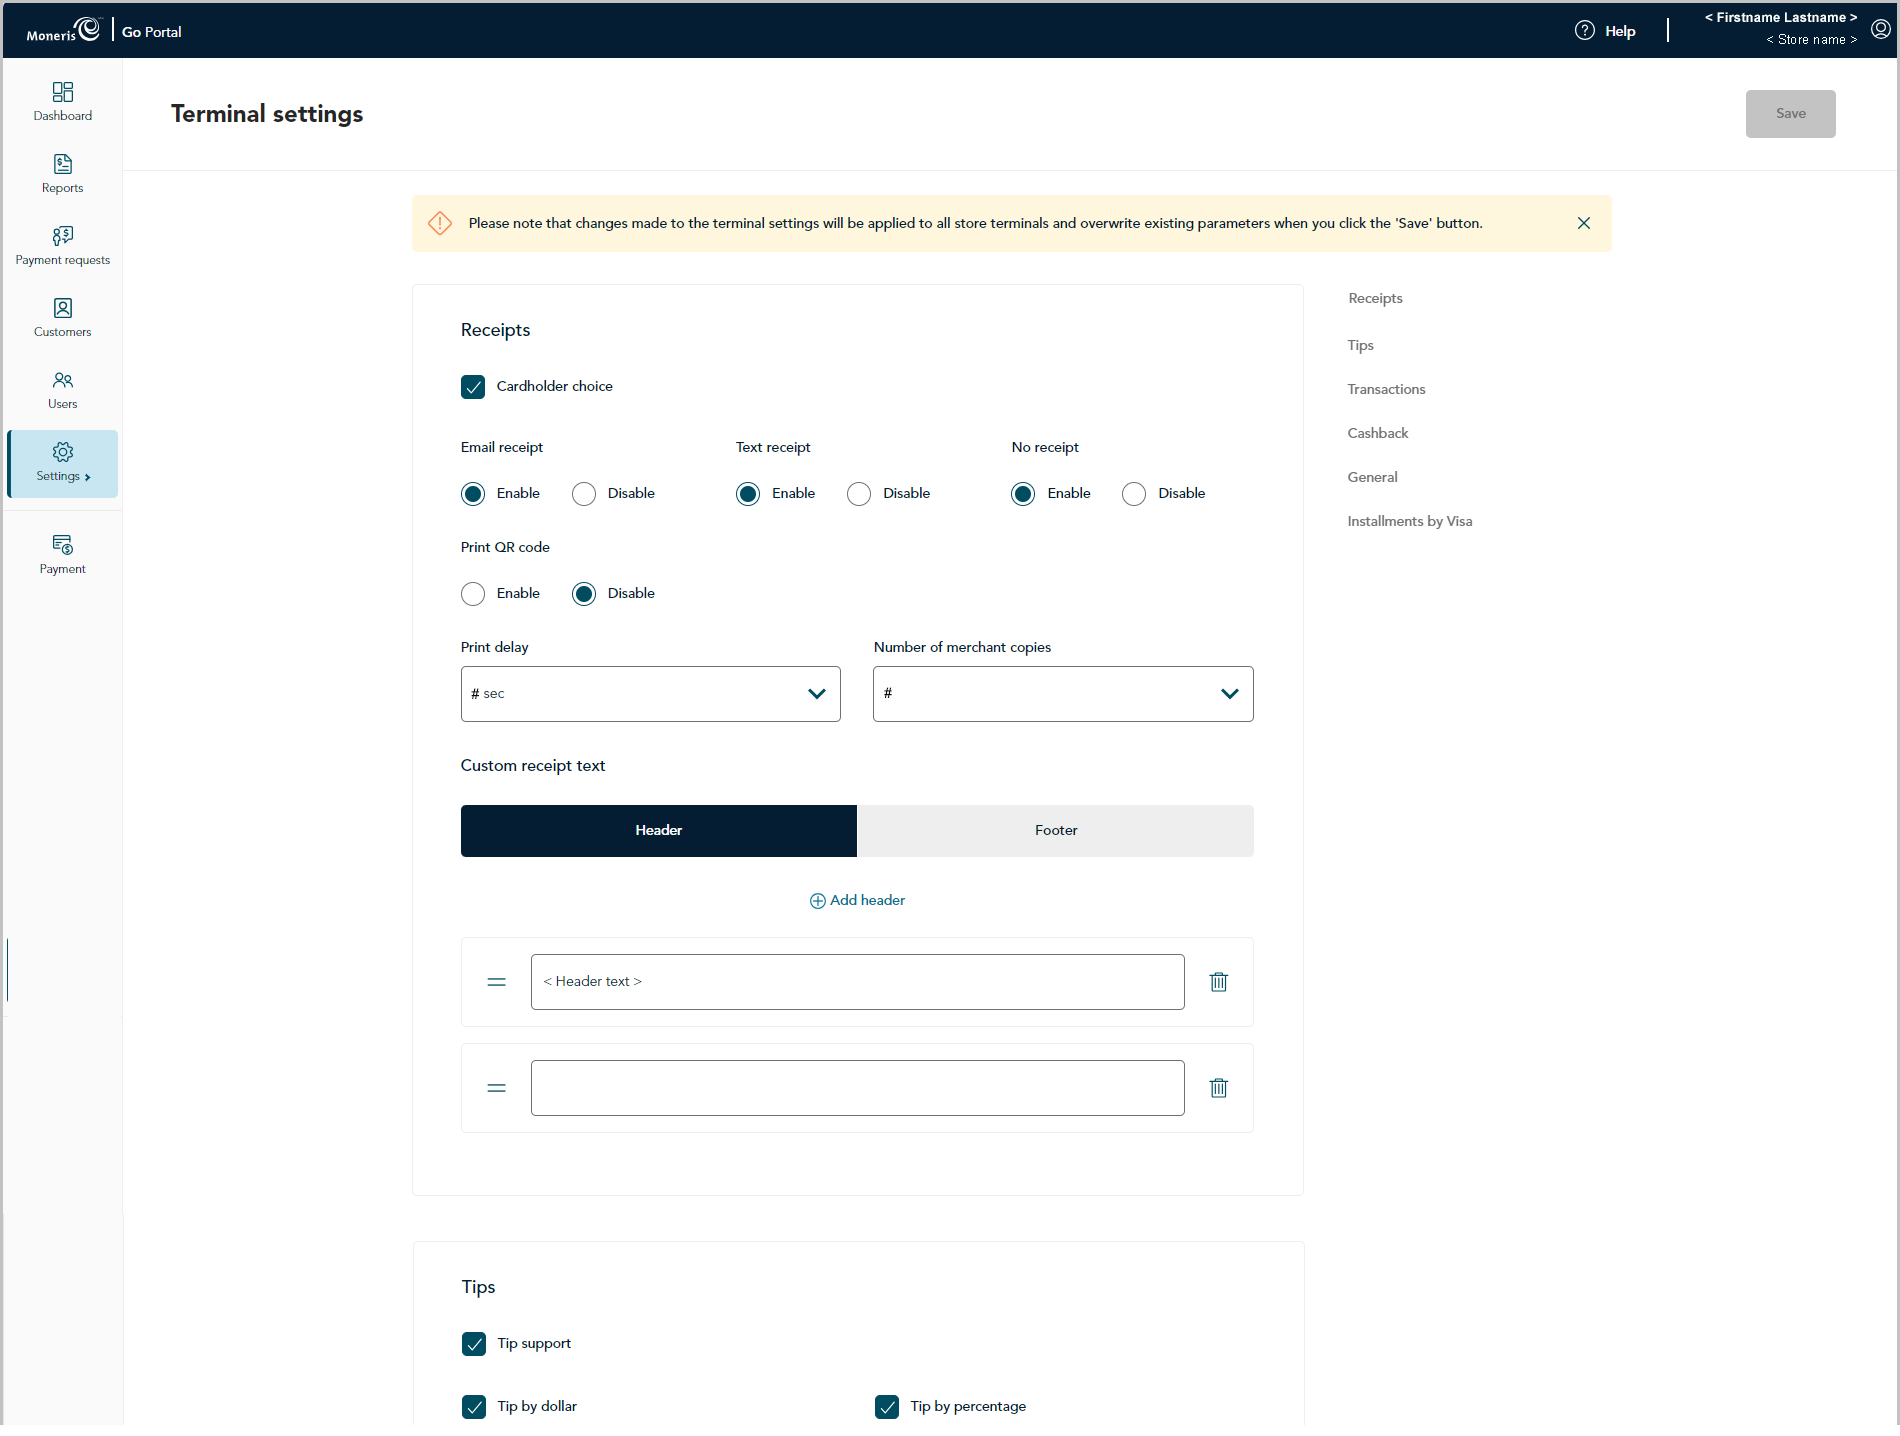
When the "Terminal settings" page displays (shown below), continue to the next step.

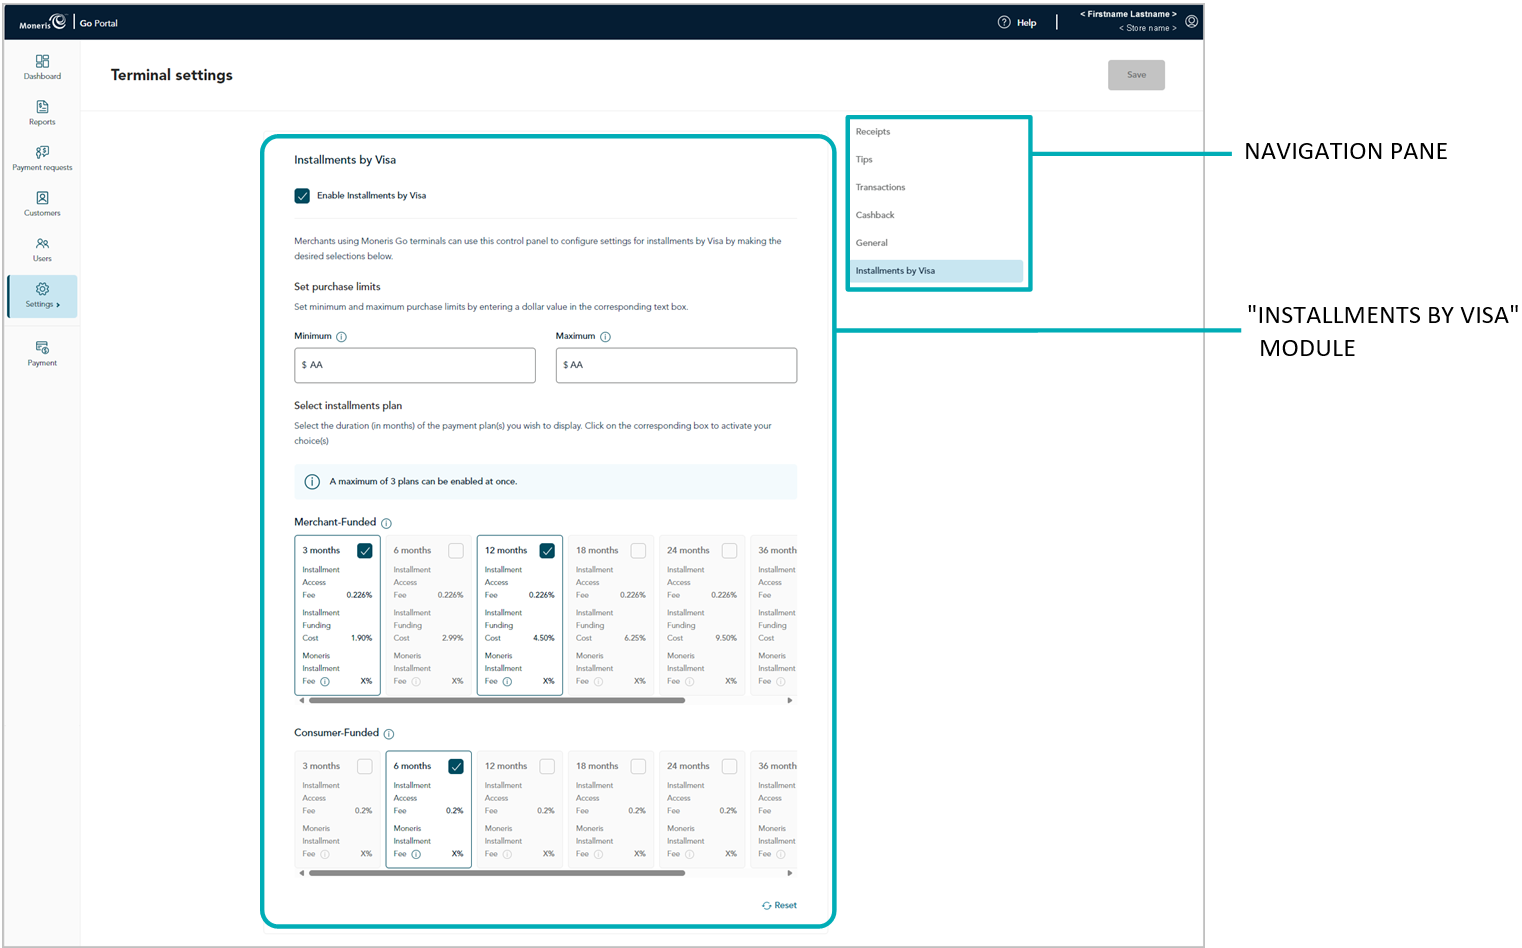
Scroll to the "Installments by Visa" module (shown below), and configure the installment settings as desired:
Note: To jump directly to the "Installments by Visa" module, click on Installments by Visa in the navigation pane (shown below).

To enable Visa installments prompting on the terminal:
a. Checkmark the Enable Installments by Visa box.
b. In the "Set purchase limits" area, optionally set a minimum and maximum qualifying Purchase amount:
To set the minimum, enter a dollar value in the Minimum field (the default is set to $100.00).
To set the maximum, enter a dollar value in the Maximum field (the default is set to $9,999,999).11
c. Select (enable) up to three installment plans:
Note: An installment plan is implemented in monthly durations (3x, 6x, 12x, 18x, 24x, 36x, or 48x months). You may enable any combination of merchant-funded plans and/or consumer-funded plans.22
To enable an installment plan, checkmark the box in the desired plan.
To disable an installment plan, unmark the box in the undesired plan.
d. If you want to reset the default plan settings, click on Reset. Otherwise, proceed directly to step e.
e. Click on the Save button.
f. When the "Changes saved" response displays, the operation is complete.
Note: On a synched standalone terminal, the change is effected when a user ends their login session on the terminal, reboots the terminal, or performs a manual Sync on the terminal. On a synched integrated terminal, the change is effected when the terminal reboots or receives a manual Sync command from the ECR to which the terminal is connected.
To disable Visa installments prompting on the terminal:
a. Unmark the Enable Installments by Visa box.
b. Click on the Save button.
c. When the "Changes saved" response displays, the operation is complete.
Note: On a synched standalone terminal, the change is effected when a user ends their login session on the terminal, reboots the terminal, or performs a manual Sync on the terminal. On a synched integrated terminal, the change is effected when the terminal reboots or receives a manual Sync command from the ECR to which the terminal is connected.