The steps below describe how to change the settings for cashback prompting on all terminals that are synched to your Moneris Go portal store. When enabled, cashback prompting displays during contact-based debit Purchase transactions performed on the terminal.
Log into the Moneris Go portal, and access the store that is synched to the terminal(s) that you want to modify (see Logging into the Moneris Go portal).
Note: If multiple stores are linked to your user account, you can use the My Stores function to move between your stores (see Using My Stores).
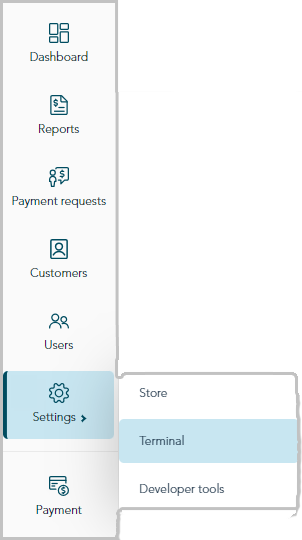
On the sidebar menu (shown below), click on Settings > Terminal.
Note: If the sidebar menu is not displayed on your screen, click on the "menu" ![]() icon in the top left corner of your screen, or expand your browser window to display the sidebar menu.
icon in the top left corner of your screen, or expand your browser window to display the sidebar menu.

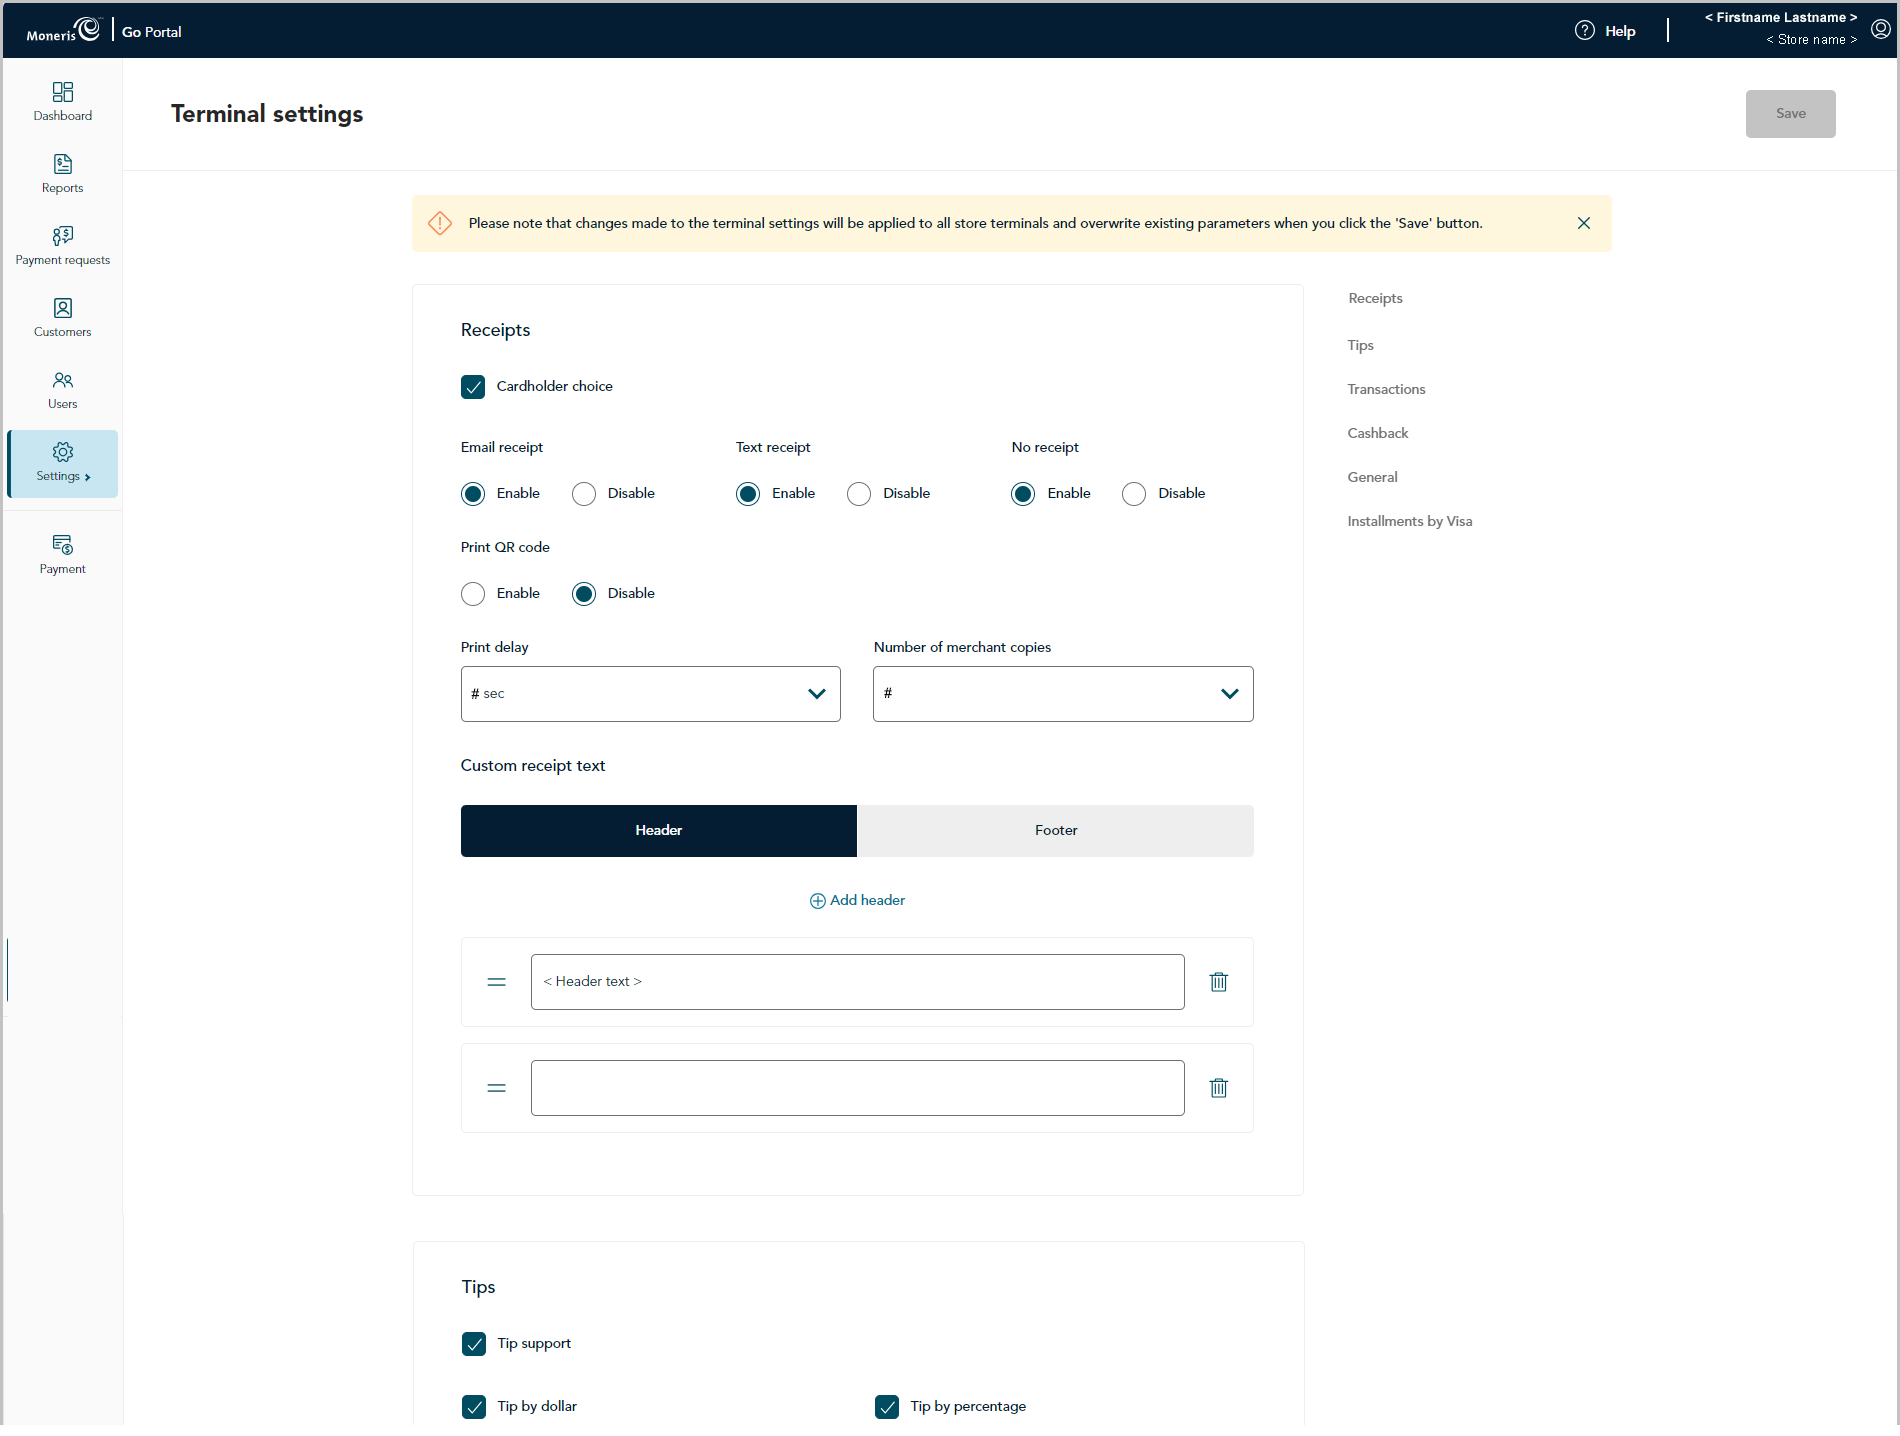
When the "Terminal settings" page displays (shown below), continue to the next step.

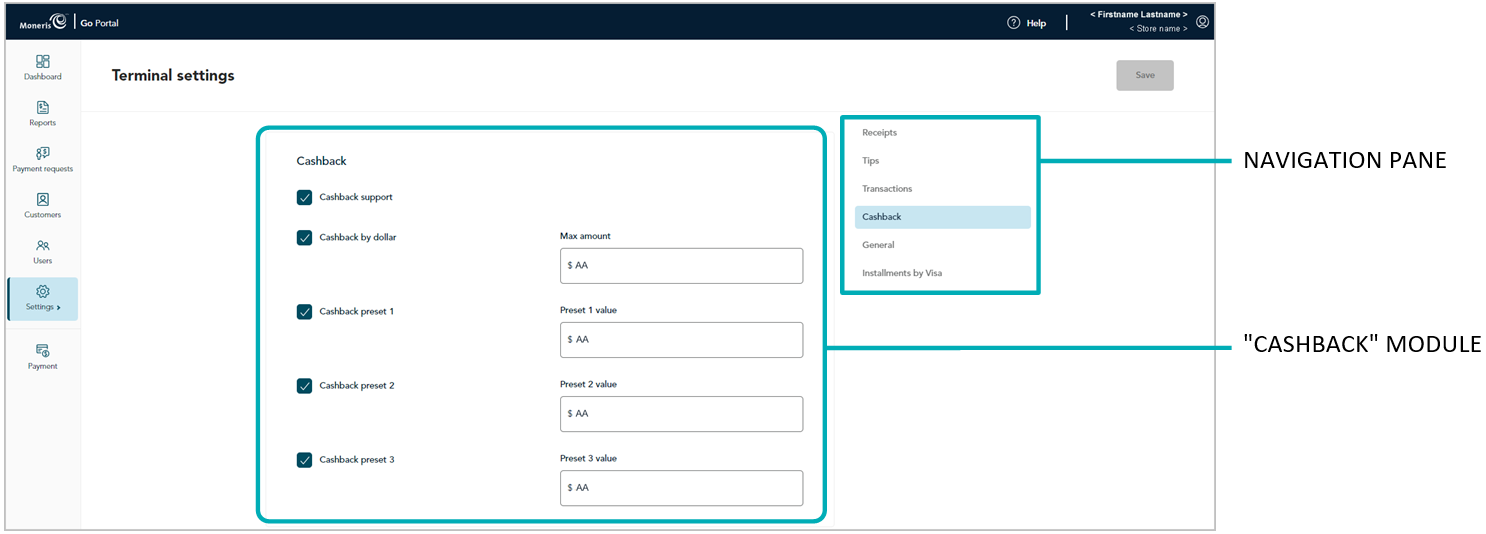
Scroll to the "Cashback" module (shown below), and configure the cashback settings as desired:
Note: To jump directly to the "Cashback" module, click on Cashback in the navigation pane (shown below).

Enable/disable cashback prompting on the terminal.
Note: If you save a new configuration for this setting, it will be overwrite the corresponding setting on every terminal that is synched to this store. The overwrite will be effected on each terminal as described below in the note at step c.
a. Do one of the following:
To enable, checkmark the Cashback support box.
To disable, unmark the Cashback support box.
b. Click on the Save button.
c. When the "Changes saved" response displays, the operation is complete.
Note: On a synched standalone terminal, the change is effected when a user ends their login session on the terminal, reboots the terminal, or performs a manual Sync on the terminal. On a synched integrated terminal, the change is effected when the terminal reboots or receives a manual Sync command from the ECR to which the terminal is connected.
Cashback by dollar11
Enable/disable the option for cardholders to enter a cashback amount on the terminal to a maximum dollar amount that you define.
Note: If you save a new configuration for this setting, it will be overwrite the corresponding setting on every terminal that is synched to this store. The overwrite will be effected on each terminal as described below in the note at step c.
a. Do one of the following:
To enable, checkmark the Cashback by dollar box, and enter the maximum dollar amount limit in the Max amount field.
To disable, unmark the Cashback by dollar box.
b. Click on the Save button.
c. When the "Changes saved" response displays, the operation is complete.
Note: On a synched standalone terminal, the change is effected when a user ends their login session on the terminal, reboots the terminal, or performs a manual Sync on the terminal. On a synched integrated terminal, the change is effected when the terminal reboots or receives a manual Sync command from the ECR to which the terminal is connected.
Cashback by preset22
Enable/disable the option for cardholders to select a pre-defined cashback dollar amount on the terminal. (There are three pre-defined dollar amount settings; each can be configured/enabled independently.)
Note: If you save a new configuration for this setting, it will be overwrite the corresponding setting on every terminal that is synched to this store. The overwrite will be effected on each terminal as described below in the note at step c.
a. Do one of the following:
To enable, checkmark the Cashback preset # box, and enter a dollar amount in the corresponding Preset value field.
To disable, unmark the Cashback preset # box.
b. Click on the Save button.
c. When the "Changes saved" response displays, the operation is complete.
Note: On a synched standalone terminal, the change is effected when a user ends their login session on the terminal, reboots the terminal, or performs a manual Sync on the terminal. On a synched integrated terminal, the change is effected when the terminal reboots or receives a manual Sync command from the ECR to which the terminal is connected.