Follow the steps below to set up a new recipient address to receive confirmation email regarding every approved/declined transaction that is processed through the checkout.
Ensure the checkout profile that you want to configure is open on your screen and email content and permissions are set (see Configuring the checkout's "Email communication" content).
While the profile's "Email communication" module (shown partially below) is open in your configurator, click on Add email recipient.

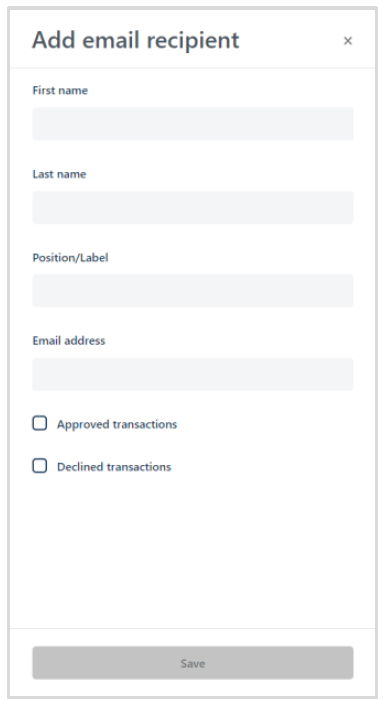
When the "Add email recipient" window displays (shown below), do the following:

a. In the First name field, enter the recipient’s given name.
b. In the Last name field, enter the recipient’s surname.
c. In the Position/label, enter the recipient’s position title.
d. In the Email address field, enter the recipient’s email address to which you want customer confirmation emails to be sent.
e. To enable the recipient to receive confirmation emails for transactions that are approved, checkmark the Approved transactions box.
f. To enable the recipient to receive confirmation emails for transactions that are declined, checkmark the Declined transactions box.
g. Click on the Save button to close the window.
Note: When the page refreshes, the added merchant address will be listed in the "Merchant email recipients" area in the module (shown belelow).

Save the profile's new configuration:
a. Click on the Save profile button.
b. When the "Successfully updated the profile" response displays, the operation is complete:
To preview a full-screen version of the checkout, see Previewing the checkout.
To configure other profile settings, see List of Moneris Checkout features/settings.
To exit the MCO configurator, click on the Go back button (unsaved changes will be discarded).