Receipts
Processing receipts from a transaction
Customer copy
The customer has up to 4 options for receiving a receipt: 1 Email, 2 Text, 3 Print, and 4 None, depending on how you have set up the customer receipt options.
| Customer option |
Merchant action |
| 1 Email |
No action required.
Moneris does not store the customer's email address. This means the customer will have to enter their email address each time they wish to receive a receipt by email.
|
| 2 Text |
No action required.
Moneris does not store the customer's cell phone number. This means the customer will have to enter their cell phone number each time they wish to receive a receipt by text.
|
| 3 Print |
The customer copy of the receipt will print on the terminal, followed by the merchant copy. You can set a pause in Receipt settings. The pause allows you time to tear off the customer receipt before the merchant copy begins printing.
Give the customer copy to the customer, but note:
- If a merchant signature line is printed, sign this copy before giving it to the customer.
|
| 4 None |
No action required. |
Merchant copy
You can set the application to print a merchant copy of each receipt for your records.
Reprinting receipts
To reprint both the customer copy and the merchant copy of a transaction, follow these steps.
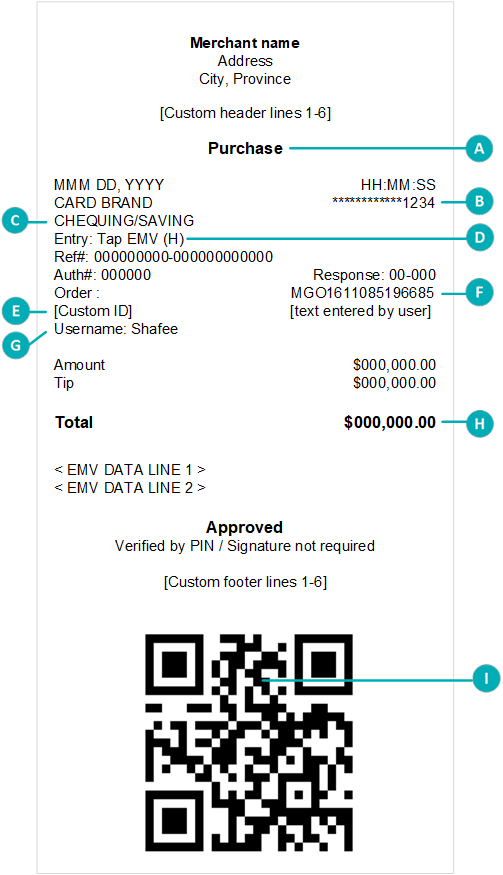
Purchase receipt example
 |
| Item |
Description |
| A |
Transaction type. For example, Purchase, Refund, Void. |
| B |
Card type and card number. Examples of card type include Interac, Visa, Mastercard, and American Express. The card number is masked — an asterisk is printed in place of the card number except for the last four numbers. |
| C |
Chequing or Saving. Indicates which account was selected by the cardholder for an Interac card |
| D |
Card entry. Indicates how the card information was entered, for example, tap, insert, or swipe. |
| E |
Custom ID. You can customize the name of this field. The value for this field is the value that you enter on the terminal during the transaction.
|
| F |
Order ID. You can use the Order ID to search for a transaction to void, to refund, or to reprint the receipt. |
| G |
Username. Indicates which user was signed in to the terminal when the transaction was processed. |
| H |
Total. This is the total sale amount including any tip. |
| I |
QR code. You can scan the QR code on a receipt to immediately find the transaction on the terminal to void, to refund, or to reprint the receipt. |
|
Partial approval receipts
Once the customer has paid the total purchase amount, the application generates a separate receipt for each partial approval. If the customer used three pre-paid cards, the application produces three partial approval receipts.
Card masking
When printed on receipts, all card numbers are masked except for the last 4 digits. Masking replaces a card’s numbers with asterisks (e.g., ************1234). The expiry date is not printed on any copy of any receipt. These measures help to prevent fraud.
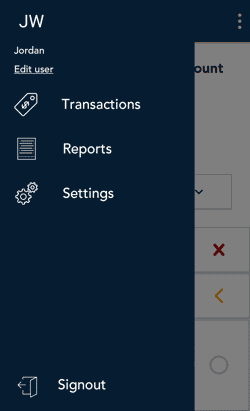
 icon, then tap Reports.