Create employee profiles
Create a profile for each member of your staff that will be interacting with the Moneris Go Restaurant app, the Kitchen Display app, or portal.
Note: Fields marked with an asterisk (*) are mandatory.
- In the Go Restaurant portal, click Profiles on the main menu.
- In the Employees screen, ensure the Employees tab is selected on the left side of the screen. The list of employees appears.
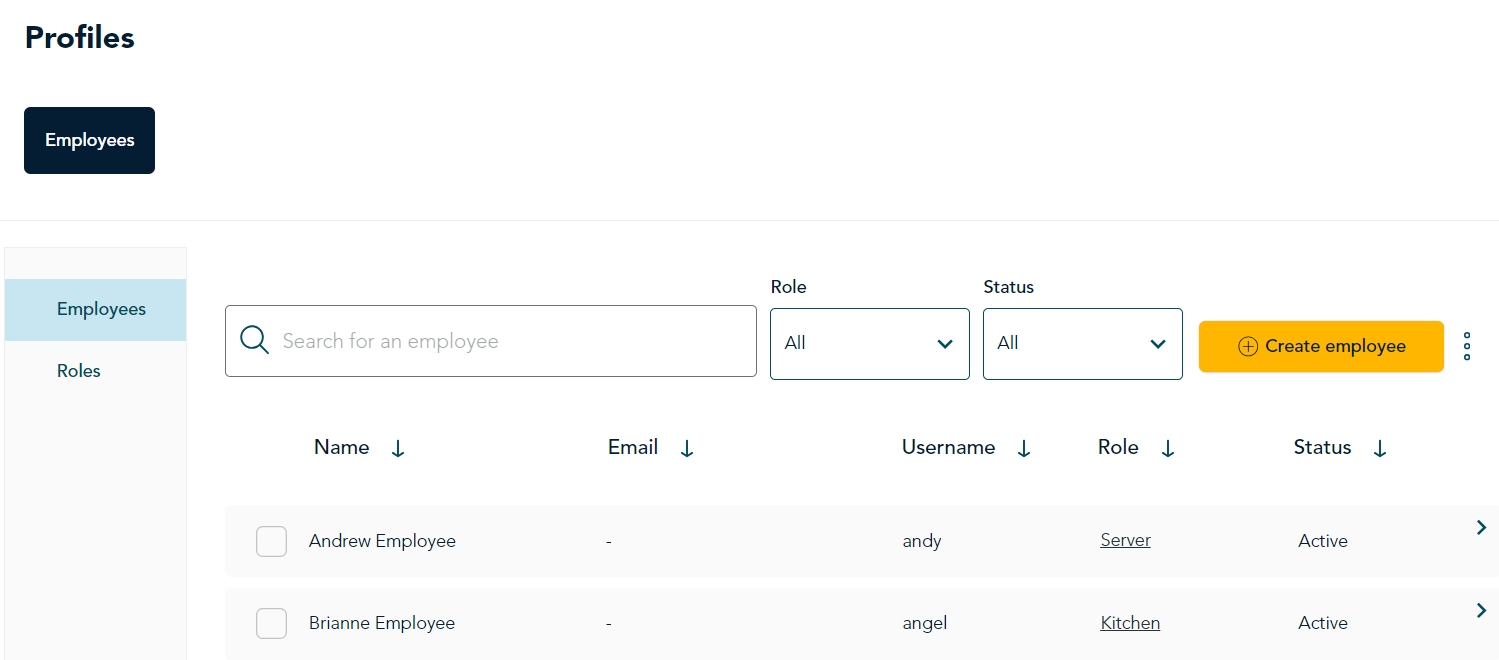
- Click the Create employee button. The New employee screen appears.
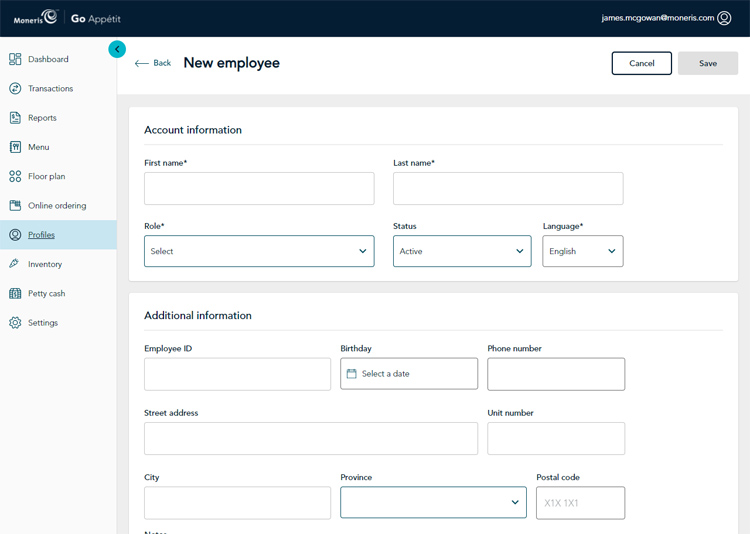
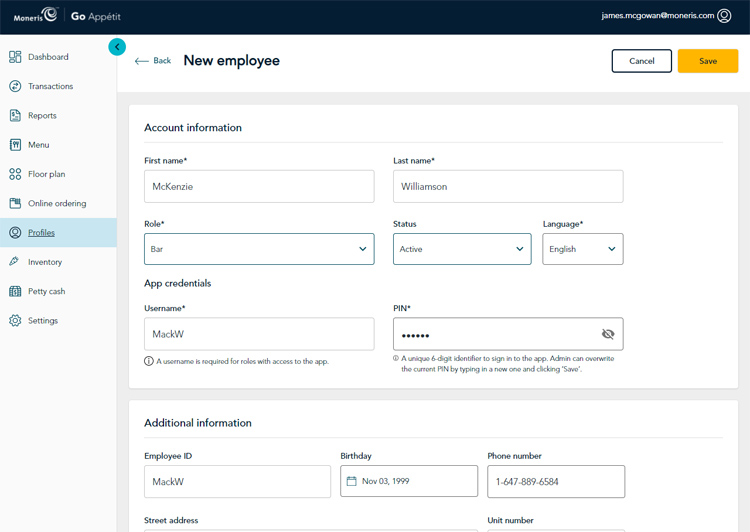
- Enter a first and last name for the employee in the provided fields.
- Click the Role drop-down menu and select the role this employee performs in your business.
Note: The roles that appear in the drop-down menu correspond to the roles you created earlier. If you do not see this employee’s role in the list, click Cancel and perform the steps to create a role profile as described in the Create employee roles section.
IMPORTANT: Some roles selected will require a user to enter login credentials to login to the apps or the portal, while other roles do not have access to the apps or portal.
- If the role has access to the portal, enter an email address for the employee. Refer to step 8.
- If the role has access to the apps, enter a username and PIN for the employee. Refer to step 9.
- If the role has access to both the portal and the apps, enter both an email address as well as a username and PIN. Start at step 8.
- Leave the Status drop-down menu set to Active.
- In the Portal credentials section, enter the employee’s email address into the Email field. This email address will be used to send the employee a message with a link to create a password. The password requirements will appear on screen as a checklist during password creation.
Note: If you click Reset Password, the employee will also receive an email message that allows them to set a new password.
Note: An employee can reset their own password at any time by clicking on the Forgot password link on the sign in page.
- In the App Credentials area of the page, click inside the Username field and enter a user name for this employee.
- Click inside the PIN field and enter a 6-digit PIN for this employee.
Note: This PIN must be unique to this employee.
Note: This PIN enables the employee to sign in to the Go Restaurant app and/or the Kitchen Display app.
- (Optional) In the Additional information section, fill out the additional information about the employee, including their Employee ID, address, and contact information.
Note: The Employee ID can match the Username you entered in step 9 above.
- Click the Save button in the top right corner of the screen. The Employees screen reappears, with the new staff member visible.
- Repeat steps 4 – 12 to create additional staff profiles as needed.