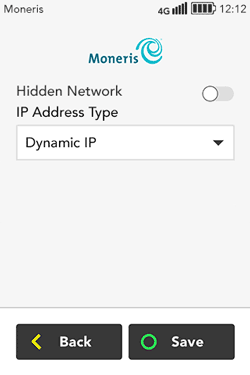
Your terminal uses dynamic IP addressing with automatic DNS as its default settings for Wi-Fi networks. To change these settings, tap Advanced Settings and follow the instructions below.
Note: If your terminal uses Wi-Fi only, disregard any references to 4G.
1. Under IP Address Type, tap the drop down menu and choose Static IP.
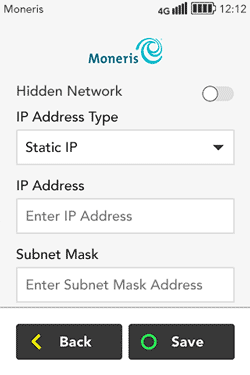
2. If your Wi-Fi network is not discoverable, tap the Hidden Network toggle to enable it.
3. Enter a value for each field:
§ IP Address: Tap the field and enter the static IP address;
§ Subnet Mask: Tap the field and enter the subnet mask address.
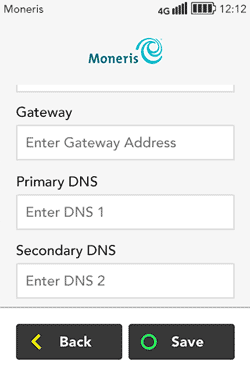
4. Scroll down and enter a value for the remaining fields:
§ Gateway: Tap the field and enter the gateway address.
§ Primary DNS: Tap the field and enter the address of the primary DNS.
§ Secondary DNS: Tap the field and enter the address of the secondary DNS.
5. Tap Save when done. The terminal saves the information you entered and returns to the “network password” screen from which you accessed Advanced Settings.
6. Click one of the links below to return to the “network password” step in this manual to continue Wi-Fi setup.
§ Connect to Wi-Fi network from the list of available networks;