Moneris Core Restaurant
Moneris Core Restaurant is a function that allows you to easily integrate
your Moneris terminal with your restaurant POS, creating efficiency for
you and convenience for your customers. Multiple Moneris terminals can
communicate with the restaurant POS at the same time.
With Moneris Core Restaurant,
you can use your terminal or terminals to:
§ retrieve
a server’s open tables and access receipt information from your restaurant
POS with the ability to incorporate this information into various receipt
formats, including e-receipts
§ select
one of the open tables and process payment from each customer at the table,
including identifying the customer’s tender type (debit, credit, gift
card) at the card entry prompt
§ split
the bill in multiple ways, including by seat/check, by amount, and by
number of persons
§ remotely
process cash payments to close out the cash portion of a bill on the restaurant
POS (provided that the terminal is configured to integrate cash)
§ allow
customers to enter a tip on the terminal, including tipping on the final
dollar amount or on the pre-tax subtotal (when configured)
Note: Consult
your restaurant POS provider for additional documentation.
Before getting started
Restaurant POS integration
methods
Restaurant POS integration
methods by terminal
Setting
up Core Restaurant on your terminal
Troubleshooting restaurant
POS integration
Performing a
Purchase transaction in restaurant mode
Before getting started
Before setting up your Moneris terminal for restaurant POS integration,
you must do the following:
§ Set up
your terminal’s hardware and software.
§ When using
an IP network, ensure that your terminal always uses the same IP address
in order to maintain a connection to your POS. You can accomplish this
in 2 ways. Choose one:
§ Configure
the network setup on your Moneris terminal to use static IP addressing.
At the Main
menu, tap Settings, Communication, and Communications
setup, then follow
these
instructions.
§ Continue
to use dynamic IP addressing, which is the default on your Moneris terminal,
but configure your router to always assign the same IP address to the
terminal. Contact your network team / IT department for assistance if
needed.
§ Ensure
you can process transactions
in standalone mode (not integrated) to verify your terminal is connected
to your own network and to the Moneris Host.
Restaurant POS integration
methods
There are two basic methods for integrating your Moneris terminal with
your restaurant POS: direct and cloud. Each one supports various
communication types, depending on which terminal you are using.
| Integration method |
Options |
| Direct |
Direct integration
through Ethernet on a common network
All communication between your Moneris terminal and your restaurant
POS takes place within your Ethernet network. |
Direct integration
through Wi-Fi on a common network
All communication between your Moneris terminal and your restaurant
POS takes place within your local Wi-Fi network. |
| Cloud |
Moneris Cloud through
Ethernet
The terminal uses your local Ethernet network to connect to
the Moneris Cloud and from the Moneris Cloud to your restaurant
POS. You are responsible for establishing the connection from
the restaurant POS to the Moneris Cloud. |
Moneris Cloud through
Wi-Fi
The terminal uses your local Wi-Fi network to connect to the
Moneris Cloud and from the Moneris Cloud to your restaurant POS.
You are responsible for establishing the connection from the restaurant
POS to the Moneris Cloud |
Third party / integrator
cloud through Wi-Fi
The terminal uses your local Wi-Fi network to connect to the
Moneris Cloud. The Moneris Cloud connects to the third party or
integrator cloud and from there to your restaurant POS. You are
responsible for establishing the connection from the integrator
or third party cloud to the Moneris Cloud. |
Moneris
Cloud through Cellular
The terminal uses the cellular network to connect to the Moneris
Cloud and then to the restaurant POS.. You are responsible for
establishing the connection from the restaurant POS to the Moneris
Cloud. |
Third party / integrator
cloud through cellular
The terminal uses the cellular network to connect to the Moneris
Cloud. The Moneris Cloud connects to the third party cloud or
integrator cloud and from there to your restaurant POS. You are
responsible for establishing the connection from the integrator
or third party cloud to the Moneris Cloud. |
Restaurant POS integration
methods by terminal
The available integration methods vary according to your terminal as
shown in this table.
Integration
method |
Options |
V400c and Desk/5000
countertop terminals |
V400m and Move/5000
wireless terminals |
Move/5000 Wi-Fi only
wireless terminal |
Direct |
Direct through Wi-Fi
|
Not
supported |
Not
supported |
Supported |
Direct through Ethernet
|
Supported |
Not
supported |
Not
supported |
Cloud |
Moneris Cloud through Wi-Fi
|
Not
supported |
Supported |
Supported |
Moneris Cloud through Ethernet
|
Supported |
Not
supported |
Not
supported |
Third party cloud through Wi-Fi
|
Not
supported |
Supported |
Supported |
Moneris Cloud through cellular network |
Not
supported |
Supported |
Not
supported |
Third party cloud through cellular network |
Not
supported |
Supported |
Not
supported |
Setting
up Core Restaurant POS integration on your terminal
Follow these steps to enable Core Restaurant on your Moneris terminal
and to configure the restaurant POS integration settings to meet the needs
of your business.
|
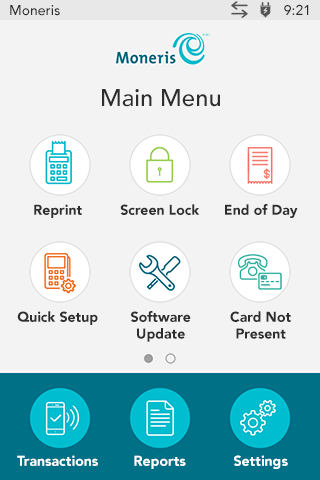
1. Starting at
the Main
menu, tap Settings,
Application, and then
Integration to get to
the integration settings. |
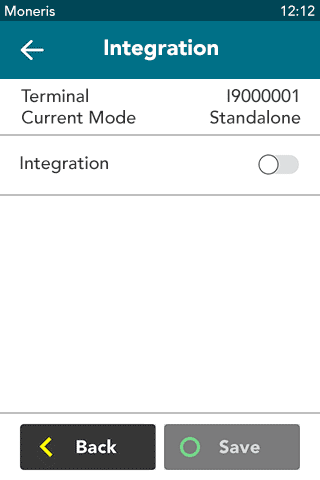
|
2. Tap the Integration toggle to enable
integration.
The Integration toggle becomes green
and the Solutions Type field appears. |
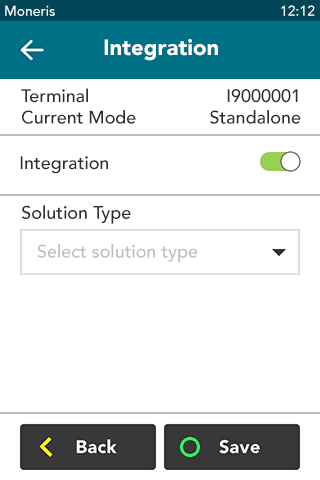
|
3. Tap the Solution Type field and select
Core Restaurant.
|
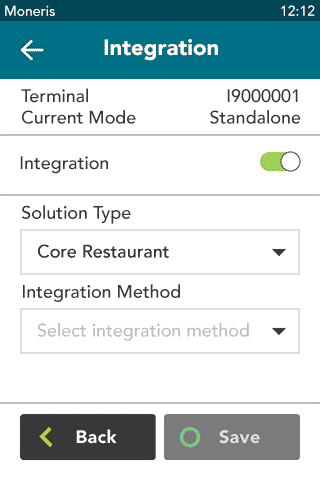
|
4. Tap the Integration Method field, then
tap Direct or Cloud.
For more information about these integration methods, refer
to Restaurant POS
integration methods, as well as Restaurant
POS integration methods by terminal above .
§ If
you are using the V400c, Desk/5000, or Move/5000 Wi-Fi only terminals,
you may choose Direct or Cloud.
§ If
you selected Direct, go to the next step.
§ If
you selected Cloud, jump to step 6.
§ If
your terminal supports dual communication (4G and Wi-Fi), confirm
that the integration method is Cloud, and jump to step 6.
|
|
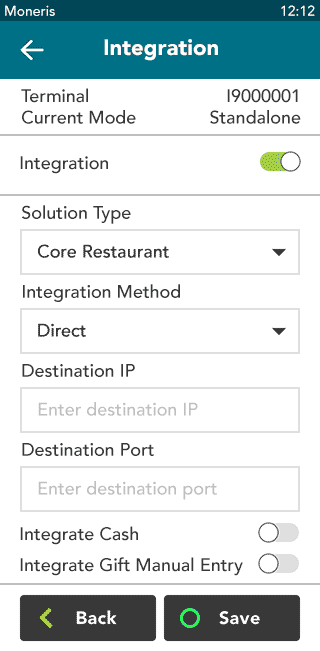
5. You selected
Direct. To implement Direct integration, your Moneris terminal
and your restaurant POS must be on a common network. To complete
the integration, follow these steps.
a. Tap
the Destination IP field
and enter the IP address of your restaurant POS device.
b. Tap
the Destination Port field
and enter the port number of your restaurant POS device.
c. Tap
the Integrate Cash toggle
if you would like to enable cash transactions on your Moneris
terminal.
d. Tap
the Integrate Gift Manual Entry
toggle if you would like to enable manual entry of gift cards
on your Moneris terminal.
e. Tap
Save to save your integration
settings.
f. Go
to step 7.
|
|
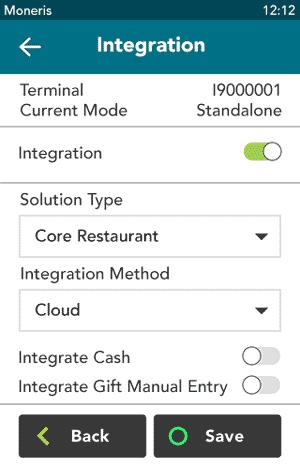
6. You selected
Cloud integration. Regardless of its location, the terminal will
connect to your restaurant POS via the cloud. Follow these steps
to complete the setup for restaurant POS integration :
a. Tap
the Integrate Cash toggle
if you would like to enable cash transactions on your Moneris
terminal.
b. Tap
the Integrate Gift Manual Entry
toggle if you would like to enable manual entry of gift cards
on your Moneris terminal.
c. Tap
Save to save your integration
settings.
d. Go
to step 7. |
|
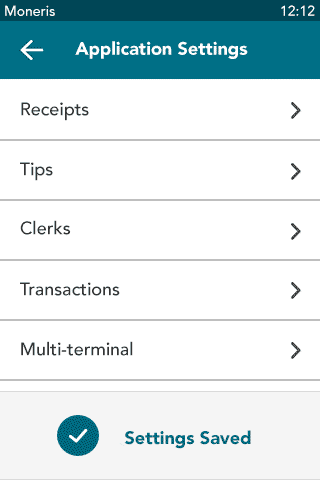
After you tap Save,
the terminal returns to the Application Settings menu.
The “Settings Saved” notification also appears.
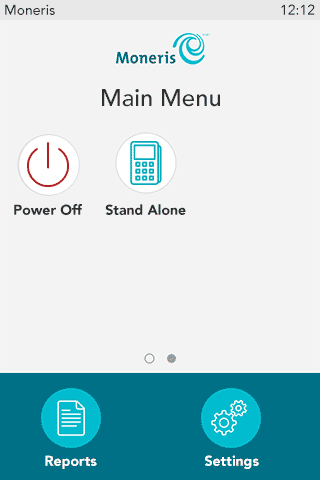
7. Press
the pound
 key on the keypad to return to the Main menu.
|
|
8. To begin a
restaurant Purchase, press the red  key on the keypad.
 |
|
9. To toggle back
to standalone mode, as required:
a. On
the Main menu, swipe left to
view the second screen.
b. Tap
Standalone. |