It is possible to review transaction details in the portal using the Transactions screen. Use this information to see a breakdown of the transaction date & time, the order type, payment method, amount paid, how the bill was split, and a list of every item on the bill and prices charged for the items. You can even use this screen to reprint the bill if needed.
In this topic, you'll learn how to:
Follow the instructions below to access the screen so that you can review transactions.
Note: The Purchases tab has to do with inventory management and paying for received inventory.
![]()
There are several filters to assist you when searching for transactions including:
These filters are described in the following sections.
The date selector features a calendar that displays with the current month and the last month by default. There are also preset selection options on the right side of the calendar. Access this date selector by clicking inside the From – To field in the Transactions screen.
Use these tips to navigate the on-screen calendar:
To search for transactions on a single date:
Selecting a date range involves clicking and dragging in the calendar. Follow the instructions below to select a date range for transactions.
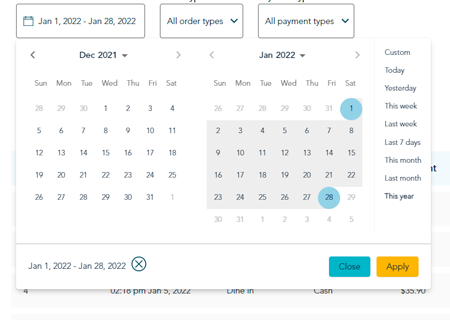
The presets along the right side of the calendar are also available to help you quickly set a date range for your transaction search. Simply choose an option, then click the Apply button.
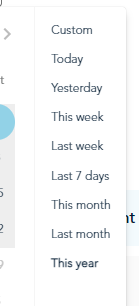
Note: These presets operate as of today's system date, so if today is April 29, 2022, then Yesterday would be considered to be April 28, and This month would be April 2022, and Last month would be considered March 2022, etc.
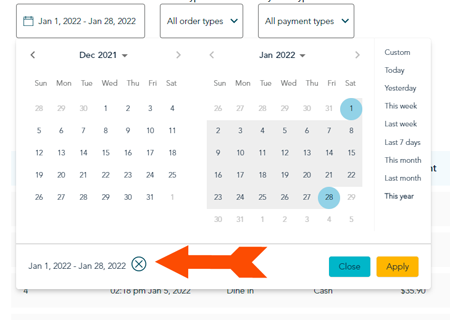
The date range you have selected appears in the bottom left corner of the calendar tool. Click on the X to reset the dates and begin a new search.
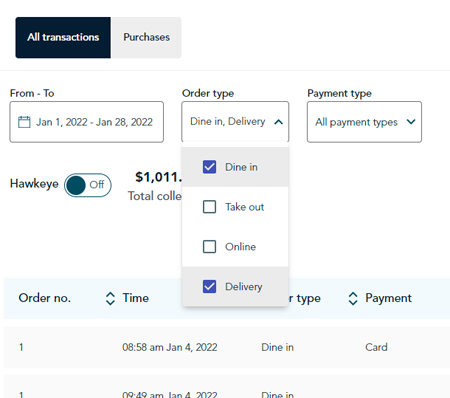
If you wish to search for transactions based on order type, you can use the Order type drop-down menu. You can search one or more order types by checking the boxes beside each one that you want to search; the unchecked boxes will be excluded from your search. As you check the boxes, the screen updates in real-time.
If you wish to search for a transaction based on the payment type, use the Payment type drop-down menu. You can search by Cash or by Card, or both; the unchecked box will be excluded from your search. As you check the boxes, the screen updates in real-time.
Note: The Card payment type encompasses all cards used, including credit and debit cards.
The Hawkeye feature enables you to monitor potentially suspicious transactions. It flags transactions within the date range and colour codes them with red, yellow, or green.
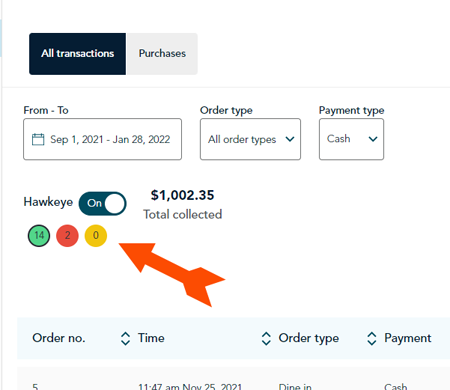
The number inside of the circle indicates the number of transactions flagged. You can click on the coloured circle to see which transactions the system has flagged. The table below explains the colour codes.
| Colour | Explanation |
| Red | Orders that had edits, deletions, discounts, and/or substitutions after the bill was finalized and printed, but before it was paid. |
| Yellow |
Orders that had edits, deletions, discounts, and/or substitutions before the bill was finalized. Transactions might also appear here if the table was closed without collecting payment on the terminal. |
| Green | Paid orders (for both in-person and online) that have not been edited, nor had any discounts applied, nor any deletions or substitutions. |
The Hawkeye feature is disabled by default. To enable it, simply toggle the Hawkeye switch to On. Click on a coloured circle to see transactions that have been flagged; they appear in the search results below.
The transactions that match your search appear in a list in the lower half of the screen. The list is dynamic, meaning that as you change criteria above like the date range or order type, the results in the list update immediately. The results list can also be sorted by clicking the up and down arrows to sort the results in ascending or descending order. The results in this list show the following information:
![]()
When you click on one of the transactions in the list, a side panel appears listing the items on the bill. From here, you can print a copy of the bill (by clicking the Print bill button and selecting your printer). When finished viewing, click the Cancel button to return to the Transactions screen.
![]()