Purchase in restaurant mode
When you enable Core
Restaurant on your terminal, the default transaction is Purchase.
A Purchase allows the customers at a table to pay their bill.
Splitting the bill
Here is a summary of the different ways in which you can handle the
bill for a table:
§ Process
full amount in one payment
§ Split
by amount
§ Split
by dollar amount (for example, there are 3 customers. The first 2 customers
pay a specific dollar amount, and the third customer pays the remaining
amount of the bill)
§ Split
by number of people (for example, there are 4 customers and they spilt
the bill equally, with each one paying 25% of the bill)
§ Split
by seat/check (each customer pays for their own order)
Purchase - step by step instructions
Follow these steps to perform a Purchase transaction in restaurant mode.
|
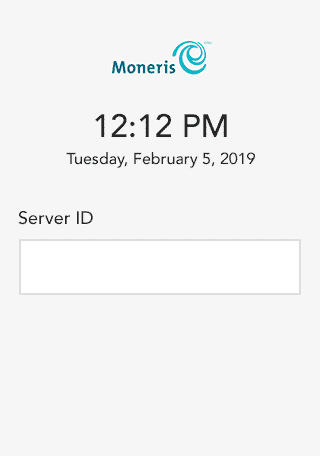
1. Enter your
server ID and tap OK (or
swipe your server card, if supported) to retrieve your open tables.
If you do not see the Server ID
screen, press the red  key.
key. |
|
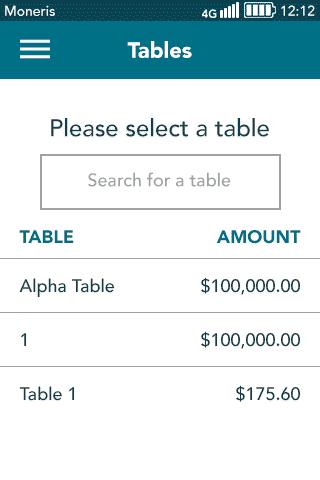
2. The terminal
displays your open tables.
a. On
the screen, tap the table you wish to process.
You can also search for a table
by tapping the search field and entering the table name or number
as appropriate |
|
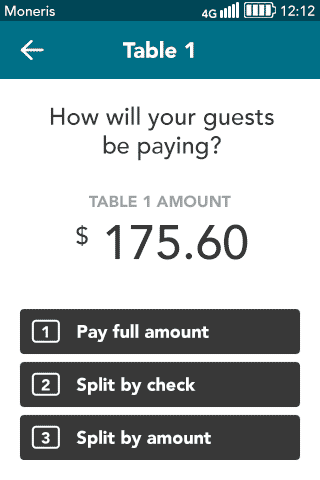
3. The terminal
displays the dollar amount owed by the selected table, along with
the options for payment:
a. Tap
one of the following options (or press the corresponding number
on the keypad):
§ 1 Pay full amount (Refer to
Pay full amount)
§ 2 Split by check (Refer to Split by check )
§ 3 Split by amount (Refer to
Split
by amount )
|
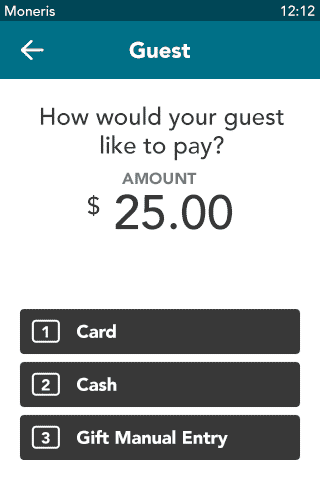
Pay full amount
|
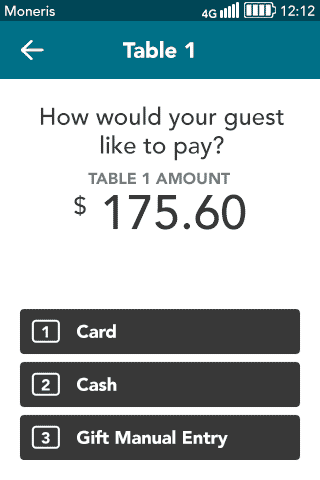
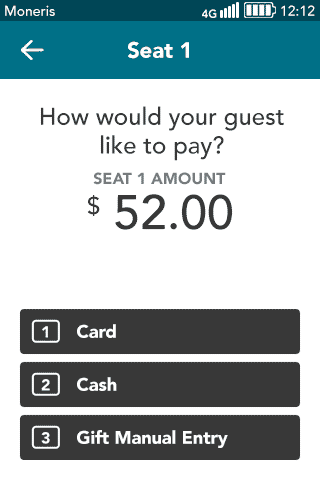
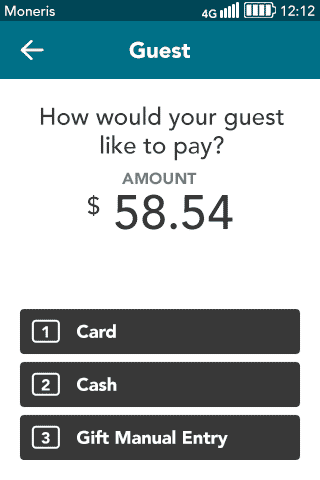
1. You selected
"Pay full amount". The terminal prompts you to ask the
customer how they would like to pay.
a. Select Card, Cash,
or Gift Manual Entry.
§ Choose
Card when the customer
wants to pay by credit card, debit card, or gift card.
Note: If
your integration settings are not configured for cash and gift
card manual entry, the terminal will skip this screen.
|
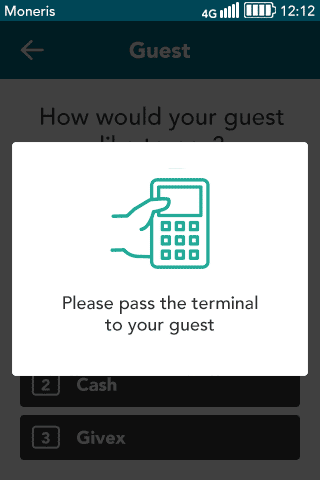
|
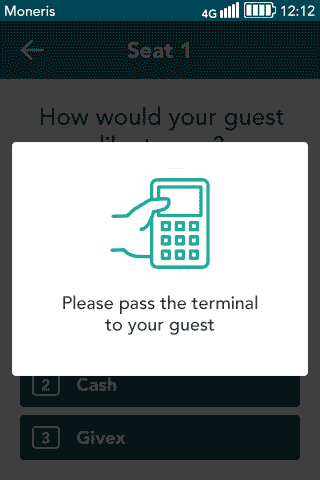
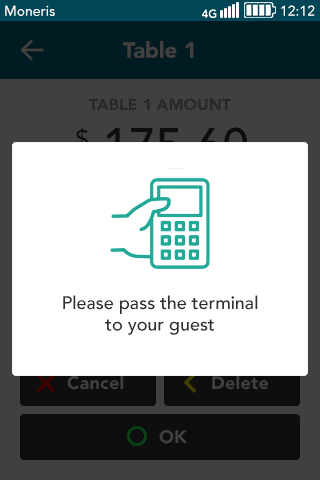
2. Pass the terminal
to your guest.
Note: This
prompt appears only if configured. |
|
3. Proceed to
Customer enters tip and
card.
|
Split by check
|
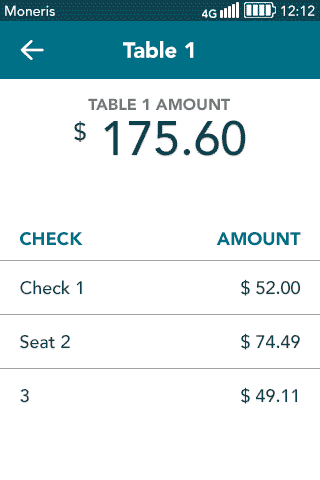
1. You selected
"Split by check". The terminal displays a list showing
each seat/check and the amount owing.
a. On the screen,
tap the seat/check you wish to process.
|
|
2. The terminal
prompts you to ask the customer how they would like to pay.
a. Select
Card, Cash,
or Gift Manual Entry.
§ Choose
Card when the customer
wants to pay by credit card, debit card, or gift card.
Note: If
your integration settings are not configured for cash and gift
card manual entry, the terminal will skip this screen. |
|
3. Pass the terminal
to your guest.
Note: This
prompt appears only if configured.
4. Proceed
to Customer enters tip
and card.
|
|
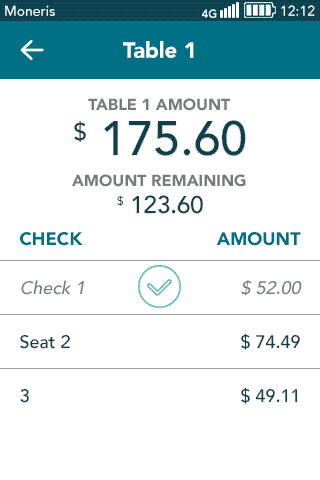
5. After each
customer pays, the terminal re-displays the list of seats/checks,
indicating which ones are paid.
a. Select
the next seat/check to process until all customers have paid their
bill. |
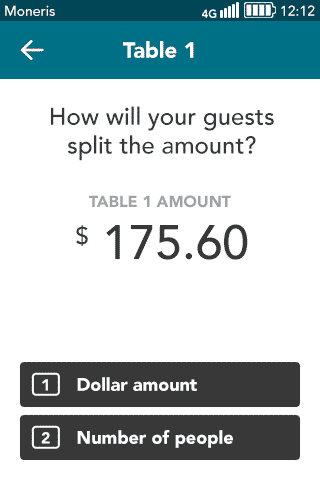
Split
by amount (dollar amount or number of guests)
|
1. You selected
"Split by amount". The terminal prompts you to ask your
guests how they will be splitting the bill.
a. Select one
of the following:
§ 1 Dollar amount (Refer to step
2)
§ 2 Number of people (Refer to
step 8)
To review what these options mean, refer to Splitting
the bill. |

|
2. You selected
"Dollar amount". The terminal prompts you to enter the
dollar amount to be paid by the first customer.
a. Enter
the dollar amount and tap OK.
|
|
3. The terminal
prompts you to ask the customer how they would like to pay.
a. Select
Card, Cash,
or Gift Manual Entry.
§ Choose
Card when the customer
wants to pay by credit card, debit card, or gift card.
Note: If
your integration settings are not configured for cash and gift
card manual entry, the terminal will skip this screen. |
|
4. Pass the terminal
to your guest.
Note: This
prompt appears only if configured.
5. Proceed
to Customer enters tip
and card.
|
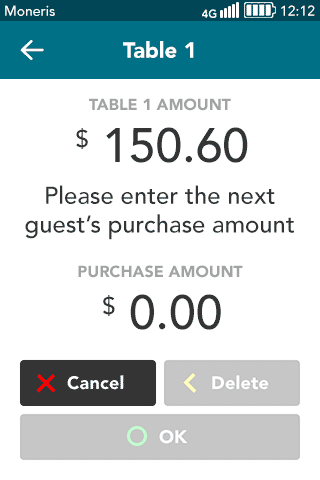
|
6. After the first
customer pays, the terminal prompts you to enter the dollar amount
for the second customer. Continue with the next customer until
all customers have paid their bill.
7. Proceed
to All checks closed. |

|
8. You selected
"Number of people". The terminal prompts you to enter
the number of guests that will be splitting the bill.
a. Enter
the number of guests and tap OK.
|
|
9. The terminal
prompts you to ask the customer how they would like to pay.
a. Select
Card, Cash,
or Gift Manual Entry.
§ Choose
Card when the customer
wants to pay by credit card, debit card, or gift card.
Note: If
your integration settings are not configured for cash and gift
card manual entry, the terminal will skip this screen. |
|
10. Pass the terminal
to your guest.
Note: This
prompt appears only if configured to do.
11. Proceed
to Customer enters tip
and card.
|
|
12. After the first
customer pays, the terminal prompts you to process payment for
the next customer. Continue until all customers have paid their
bill. |
Customer enters tip and
card
|
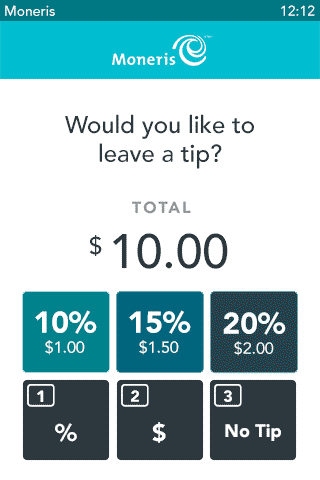
1. The terminal
displays the tip entry screen (if tipping is enabled).
a. The customer
enters a tip amount or chooses no tip. |

|
2. The terminal
displays the final purchase amount and prompts the customer to
tap, insert,
or swipe their card.
3. Do
one of the following:
§ If
there are more guests for the selected table, continue to process
payments.
§ If
this is the last guest for the selected table, proceed to All
checks closed. |
All checks closed
|
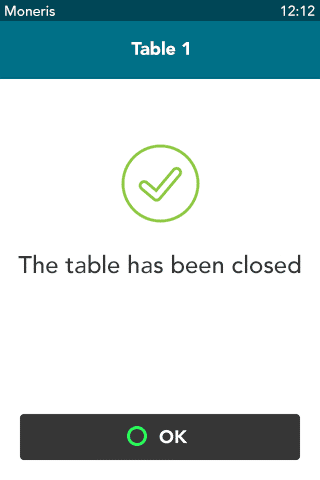
This is the final step when
all seats/checks have been closed for the selected table, regardless
of how the bill was split among the seats/checks.
1. When
the terminal displays “The table has been closed,” tap OK.
The terminal returns to the Server
ID screen.
|