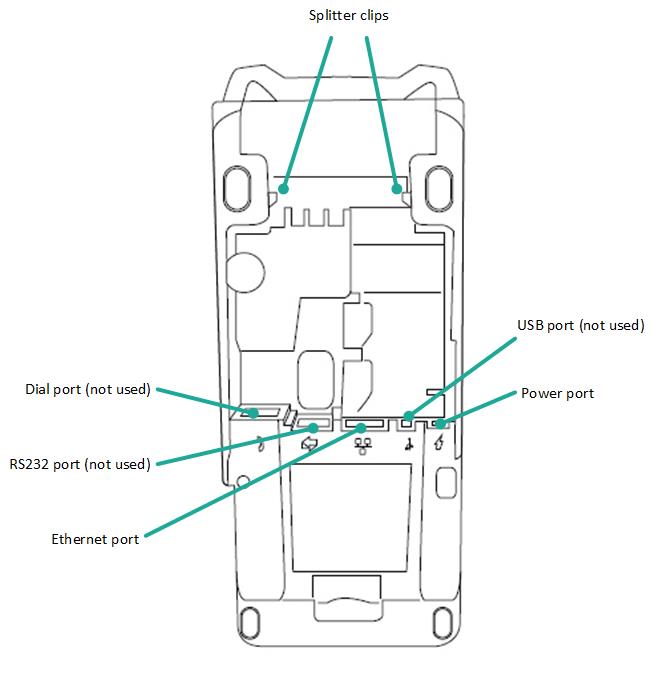
Refer to the diagrams below to understand the connection ports on the all-in-one cable and the terminal.
Figure 1: The all-in-one cable
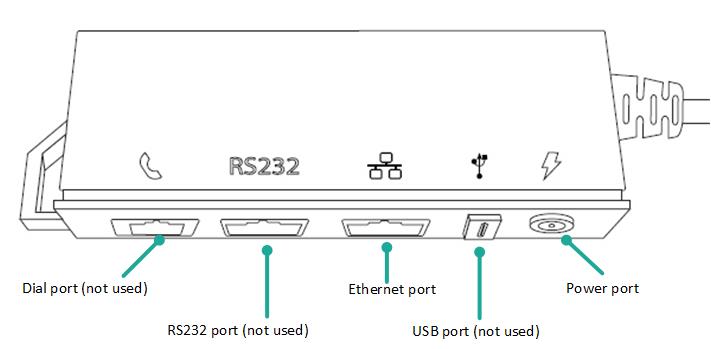
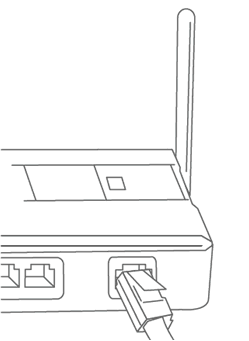
Figure 2: The Multi-port Box

Figure 3: The splitter
The all-in-one cable is already connected to the terminal when Moneris ships it to you. These steps explain how to connect cables to the all-in-one cable.
|
1. Plug
one end of the Ethernet cable into the Ethernet port on the multi-port
box labelled with the network symbol (
|
|
2. Plug the other end of the Ethernet cable into the router/switch/hub/internal wiring — whatever is applicable to the high-speed Internet service at your location. (If necessary, please refer to the Moneris Ethernet Readiness Checklist available at moneris.com/support-V400c).
|
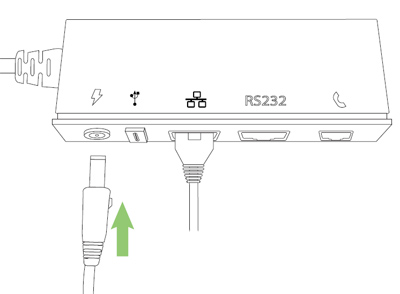 |
1. Insert
the power cable's barrel connector into the multi-port box's power
port labelled with the power symbol |
2. Plug the other end of the power cable into a power source. The terminal will power on. Recommendations: Always plug the power cable into the power source last to avoid power surges. Use a power bar equipped with surge protection if possible. Do not use the power cable from your existing terminal, as it may damage your new terminal. IMPORTANT! You must use the exact power adaptor and cables provided by Moneris to work with your terminal. Failure to do so may affect the operability of, or cause damage to, the equipment. |
3. Plug the other end of the power cable into a power source. The terminal will power on.
Recommendations: Always plug the power cable into the power source last to avoid power surges. Use a power bar equipped with surge protection if possible. Do not use the power cable from your existing terminal, as it may damage your new terminal.
IMPORTANT! You must use the exact power adaptor and cables provided by Moneris to work with your terminal. Failure to do so may affect the operability of, or cause damage to, the equipment.
Note: Refer to Supplemental information on cable connections if the all-in-one cable is not already connected, or if you do not wish to use the all-in-one cable.
If your terminal (or optional P400 PIN pad) has a protective film covering the display screen, peel the film off.
Hint: Peel from the top right to the bottom left corner.
|
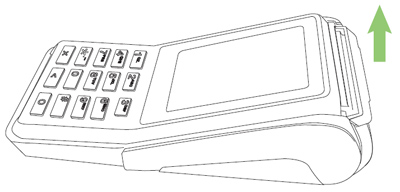
1. Lift the printer latch up, and then pull back to open the lid and expose the paper well. |
|
|
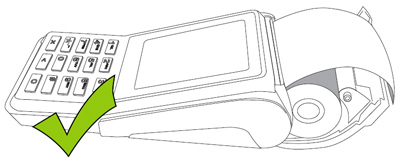
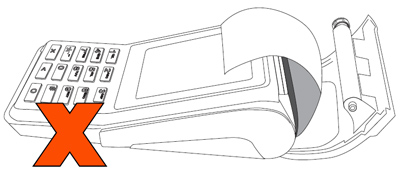
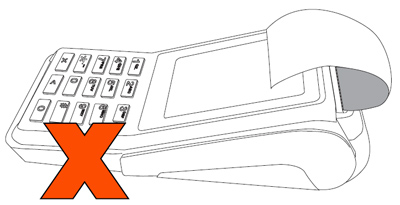
2. Insert the paper roll into the paper well with the loose end unrolling from the top of the roll toward the back of the terminal. Note: If the paper is installed backward, your printouts will be blank. 3. Unroll enough paper to extend at least one inch (2.5 cm) over the top of the lid. |
|
4. Close the lid, and press down to snap it back into place so that the extended paper is pressed securely against the top of the closed lid. Note: The paper should unroll back over the top and back of the terminal, not unroll over the faceplate. Warning! DO NOT attempt to manually advance the paper by pulling it as this will damage the printer. |
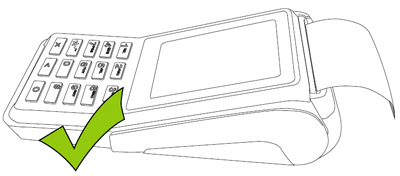
5. Your hardware setup is complete. Go to Software setup.

 ).
). 
 .
.