- Tap the Main menu
 icon, then tap Settings, then tap User management.
The "Users" screen appears.
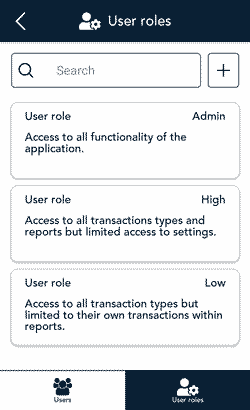
- At the bottom of the screen, tap User roles.
Each existing user role appears in a compact format, showing the first two fields.
- Choose a task:
- View and edit a user role: Tap a user role then go to step 4.
- Search for a user role: Tap the Search field then go to step 5.
- Create a new user role: Tap + next to the Search field then go to step 6.
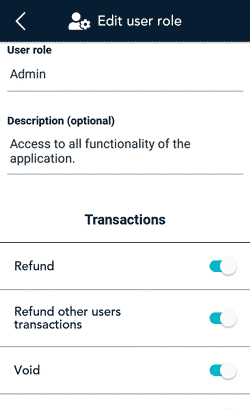
- View and edit a user role. View the details of the user role you selected, and change them if needed.
If your own user role is Admin, you can perform these actions:
- Tap a field to edit it.
- For transactions, reports, and settings, tap the adjacent toggle to enable or disable which ones this user role is allowed to access. Tap Save when finished.
- Delete the user role.
Note: You cannot delete a user role if that role is currently assigned to any users.

- Search for a user role. Use the on-screen keyboard to enter a specific value in the Search field, such the name of the user role (for example, High) or a word that might appear in the description of the user role (for example, manager).
- The application displays all user roles that match your search terms.
- Tap on a user role to display full details.
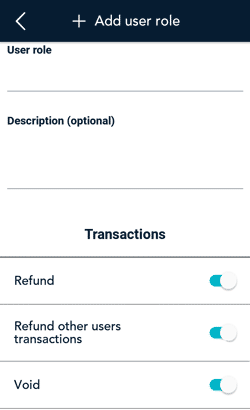
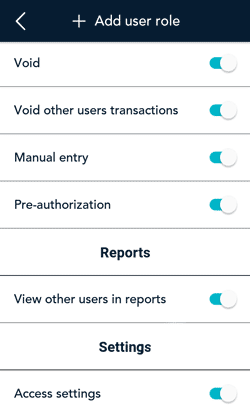
- Create a new user role. On the “+ Add role” screen, fill in each field and review each setting.
- Tap the User role field and enter a name (for example, Middle).
- Tap the Description field and enter a short description (for example, Supervisors) to indicate who this role might be assigned to. This field is optional.
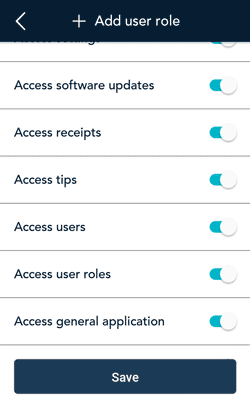
- Transactions, Reports, and Settings. Tap the toggle beside each item to enable or disable it.
- Tap Save to save the new user role.