- Tap the Main menu
 icon, then tap Settings.
 - On the Settings menu, tap Receipts.
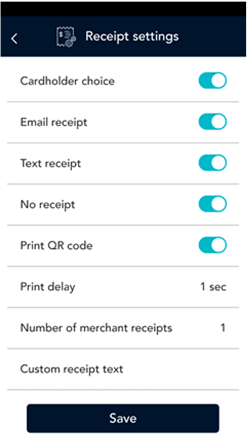
The Receipt settings screen appears.
-
Receipt formats. To give your customers a choice of receipt formats, tap the toggle next to Cardholder choice.
- The options for receipt formats appear: Email, Text, and No receipt.
- Enable or disable each format by tapping the toggle next to it.
Note: If you disable Cardholder choice, the terminal will print a customer receipt automatically.
- Print QR code. By default, the application prints a QR code on each receipt. To disable printing QR codes, tap the toggle.
- Print delay. This setting determines the delay (in seconds) between printing the customer receipt and printing the merchant receipt. The default value is zero seconds.
- To change the setting, tap the Print Delay field and choose a new value.
- Number of merchant receipts. By default, the terminal will not print a merchant receipt. If you want a receipt for each transaction, tap the field and select a new value (1 or 2 receipts).
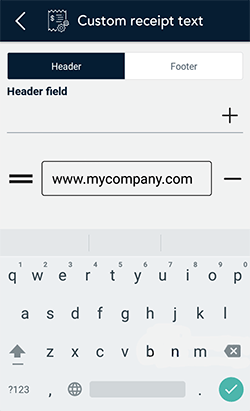
- Custom receipt text. To add header or footer text to your customer receipts, tap Custom receipt text then refer to Working with headers and footers below.
- When you are finished with the receipt settings, tap Save.
The application returns to the Settings menu.
- To return to the default transaction screen, tap the Main menu icon, then tap Transactions.