key once.
 If you are using a Wi-Fi network to communicate with Moneris, it is important to correctly set up the network on your terminal.
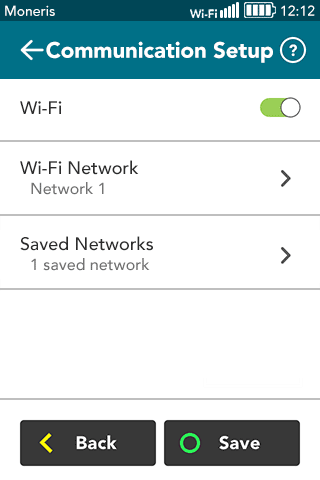
The Communication Setup screen allows you to:
§ set up one or more Wi-Fi networks
§ forget a saved network
§ change a network password
§ change network settings from dynamic IP to static IP
Note:
When entering IP addresses, use the terminal's keypad. To enter
a period, press the punctuation key once.
1. From the Main menu, tap Settings > Communication > Communication Setup.
2. Tap the Wi-Fi toggle to enable or disable Wi-Fi communication.
Note: If your terminal uses Wi-Fi only, Wi-Fi must be enabled in order to communicate with Moneris.
Note: If you disable Wi-Fi, the terminal will remember the Wi-Fi networks you have set up. You will not have to set them up again.
|
3. When Wi-Fi communication is enabled, you can: § Set up a Wi-Fi network either by scanning or by manual entry (Refer to section below) § View and modify saved networks (These are networks to which you have already connected. Refer to section below.) 4. Do one of the following: § If you made any changes on this screen, tap Save; § If you did not make any changes, tap Back.
|
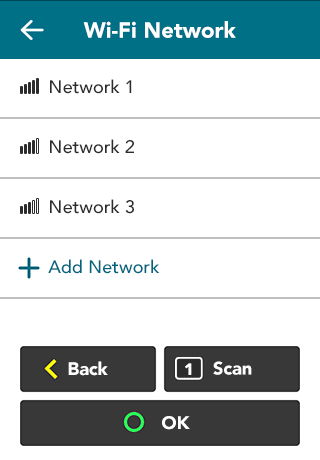
1. At the Communication setup screen (see above), tap Wi-Fi Network.
The terminal scans your environment for Wi-Fi networks and displays a list of available networks. Only protected networks are displayed.
|
2. On the list of Wi-Fi networks discovered, choose from the following options: § To connect to one of the networks displayed, tap the network name and go to step 3. § To scan your environment again, tap Scan. § To connect to a hidden network, go to Manually add a Wi-Fi network.
|
|
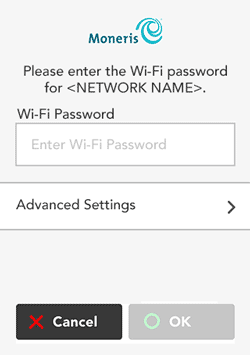
3. Tap the Network Password field, enter the Wi-Fi password, and tap OK. § If your network uses static IP addressing, tap Advanced Settings and refer to Advanced Wi-Fi settings. 4. Tap Save. The terminal connects to Moneris.
|
The Saved Networks screen allows you to view properties for saved networks, change the network password, and modify network settings (for example, switching from dynamic IP to static IP addressing).
1. At the Communication setup screen (see above), tap Saved Networks.
The terminal displays the list of Wi-Fi network(s) to which you have connected in the past.
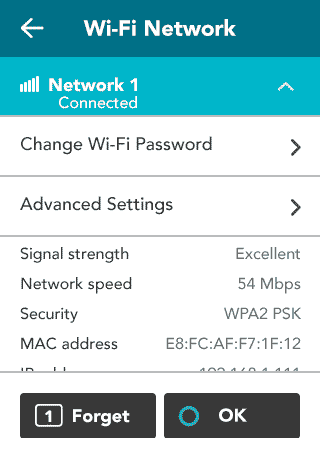
2. Tap the saved network that you wish to view or modify.
The terminal displays the properties of the selected network, including signal strength, IP addresses, primary DNS, and secondary DNS, among other values.
|
3. Choose an action: § To tell the terminal to forget this network, tap Forget or press 1 on the terminal keypad. At the confirmation prompt, tap OK. The terminal removes the network from the list of saved networks. § If the password for this Wi-Fi network has changed, tap Change Wi-Fi Password, enter the new password, and tap OK. § To change this network from dynamic IP to static IP, tap Advanced Settings. On the dropdown menu select Static IP, enter the required values, and tap Save. For step by step instructions, go to Advanced Wi-Fi settings. 4. Tap OK to save your changes.
|